
Dokan: Marketplace Vendor Approval Workflow (Complete Guide 2026)
A successful multi-vendor marketplace needs more than vendor registration. Marketplace owners also need a structured process for reviewing applications, verifying vendor information, approving sellers, and controlling when vendors can start selling.
The Dokan Marketplace Vendor Approval Workflow provides a framework for managing this process from initial registration through vendor activation.
A well-designed workflow can help marketplace administrators maintain seller quality, reduce fraudulent registrations, improve marketplace trust, and create a more organized onboarding experience.
What Is a Vendor Approval Workflow?
A vendor approval workflow defines what happens after a seller registers on a Dokan-powered marketplace.
A typical process can be:
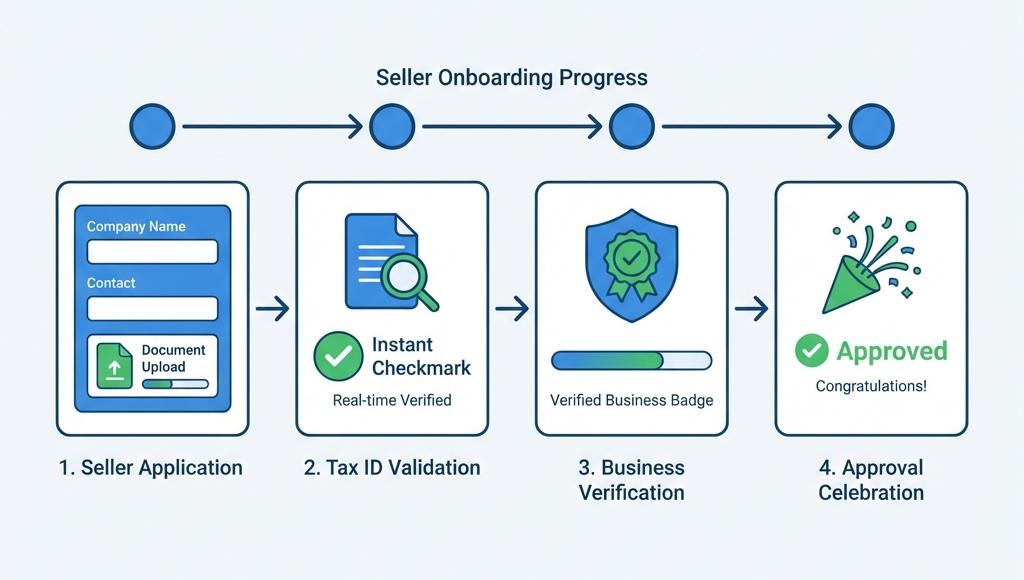
Vendor Registration → Verification → Admin Review → Approval → Store Setup → Product Submission → Selling
Depending on the marketplace, additional review stages can be added.
Why Vendor Approval Matters
Approving vendors before they begin selling can help marketplaces:
- Maintain Seller Quality
- Reduce Fake Vendor Accounts
- Control Marketplace Access
- Verify Business Information
- Improve Customer Trust
- Reduce Risk
- Standardize Vendor Onboarding
The appropriate approval process depends on the marketplace’s products, business model, geography, and risk profile.
Automatic vs Manual Vendor Approval
There are two common approaches.
Automatic Approval
A vendor becomes active immediately after registration or basic verification.
Advantages
- Faster onboarding
- Less administrative work
- Better for low-risk marketplaces
- Vendors can start selling quickly
Disadvantages
- Less control
- Greater risk of low-quality sellers
- More difficult to review vendor information before activation
Manual Approval
A vendor registers and waits for administrator review.
Advantages
- Better marketplace control
- Vendor information can be reviewed
- Suitable for regulated or higher-risk marketplaces
- Helps maintain seller quality
Disadvantages
- Requires administrative resources
- Can increase onboarding time
Recommended Vendor Approval Workflow
A structured workflow can look like this:
Step 1: Vendor Registration
The seller submits the registration form.
Step 2: Email Verification
The seller confirms their email address where required.
Step 3: Information Collection
The marketplace collects required business or seller information.
Step 4: Application Review
An administrator reviews the application.
Step 5: Additional Information
If something is missing, the vendor is asked to provide more information.
Step 6: Approval or Rejection
The administrator makes a decision.
Step 7: Store Setup
The approved vendor configures their store.
Step 8: Product Submission
The vendor adds products according to marketplace rules.
Step 9: Activation
The vendor becomes fully operational.
Vendor Approval Statuses
A clear status system makes the workflow easier to manage.
Possible statuses include:
- Pending
- Under Review
- Additional Information Required
- Approved
- Rejected
- Suspended
Each status should have a clearly defined meaning.
Pending Status
A newly registered vendor can initially be marked as Pending.
During this stage, the vendor may not have access to all marketplace functionality.
The administrator can review:
- Registration Information
- Business Details
- Contact Information
- Documents
- Store Information
Under Review
The Under Review status indicates that an administrator is actively evaluating the application.
This prevents confusion between newly submitted applications and applications already being processed.
Additional Information Required
Not every incomplete application needs to be rejected.
Instead, the marketplace can request additional information.
For example:
Please provide your business registration document before your application can be approved.
This creates a better experience for legitimate vendors.
Approved Vendor
Once approved, the vendor can receive access to the appropriate marketplace features.
Depending on the configuration, this can include:
- Vendor Dashboard
- Store Settings
- Product Management
- Orders
- Coupons
- Earnings
- Withdrawals
- Reports
Rejected Vendor
If the application does not meet marketplace requirements, it can be rejected.
The marketplace should provide an appropriate explanation where possible.
Avoid vague messages such as:
Your application was rejected.
A more useful message might explain the general reason or required next step without exposing sensitive internal information.
Suspended Vendor
Approval does not necessarily mean permanent access.
A vendor may later be suspended because of:
- Policy Violations
- Fraud Concerns
- Poor Seller Performance
- Expired Documentation
- Repeated Customer Complaints
- Marketplace Rule Violations
Suspension workflows should be clearly separated from initial application rejection.
Admin Vendor Approval Dashboard
A centralized dashboard can make vendor management significantly easier.
Administrators could view:
- New Applications
- Pending Vendors
- Vendors Under Review
- Approved Vendors
- Rejected Vendors
- Suspended Vendors
Useful filters include:
- Vendor Name
- Registration Date
- Status
- Vendor Type
- Location
- Verification Status
Vendor Application Review
An administrator should be able to review important information from one place.
For example:
Vendor Profile
→ Account Information
→ Business Information
→ Contact Information
→ Verification Details
→ Documents
→ Store Information
→ Review History
→ Admin Notes
→ Approval Actions
This can reduce the need to navigate through multiple WordPress screens.
Vendor Verification Before Approval
Depending on the marketplace, approval may require verification of:
- Phone
- Business Information
- Address
- Tax Information
- Business Registration
- Professional Credentials
- Supporting Documents
Only collect and verify information that is appropriate for the marketplace’s actual requirements.
Document Review
Some vendors may need to submit documents before approval.
Examples include:
- Business Registration
- Tax Certificates
- Professional Licenses
- Insurance Documents
- Certifications
Administrators should be able to determine:
Submitted → Under Review → Approved / Rejected
Sensitive documents should have restricted access.
Vendor Approval Notifications
Automated notifications can keep vendors informed.
Useful emails include:
Application Received
Confirms that the registration was successfully submitted.
Under Review
Lets the vendor know that their application is being evaluated.
Additional Information Required
Explains what the vendor needs to provide.
Application Approved
Confirms that the vendor can continue onboarding.
Application Rejected
Provides an appropriate explanation or next steps.
Vendor Suspended
Explains that marketplace access has been restricted.
Approval Workflow Automation
Automation can reduce repetitive administrative work.
For example:
Registration
↓
Email Verification
↓
Automatic Data Validation
↓
Admin Review
↓
Approval
↓
Welcome Email
↓
Store Setup Checklist
Automation should be used for predictable tasks while keeping important decisions under appropriate human control.
Vendor Store Setup After Approval
Approval should ideally be followed by a guided store setup process.
Vendors may need to configure:
- Store Name
- Logo
- Banner
- Store Description
- Contact Details
- Location
- Shipping
- Payment Settings
- Store Policies
A setup checklist can help vendors complete the required configuration.
Product Approval After Vendor Approval
Vendor approval and product approval can be separate workflows.
For example:
Vendor Approved
↓
Product Submitted
↓
Product Review
↓
Product Approved
↓
Product Published
This is useful for marketplaces where product quality or compliance needs to be reviewed.
Vendor Approval Rules
Different vendor types may require different workflows.
For example:
Standard Vendor
Basic information + email verification.
Business Vendor
Business information + additional verification.
Professional Vendor
Business information + professional credentials.
Enterprise Vendor
Enhanced review + commercial agreement.
The workflow should reflect actual business requirements rather than adding unnecessary complexity.
Vendor Approval by Category
A marketplace can also have different approval requirements depending on what vendors sell.
For example:
Low-Risk Category
→ Standard approval.
Higher-Risk Category
→ Additional documentation and manual review.
This can help marketplaces apply appropriate controls without creating excessive friction for every seller.
Vendor Approval & Permissions
Approval status should determine what the vendor can access.
For example:
Pending
→ Limited Account Access
Approved
→ Vendor Dashboard
Suspended
→ Restricted Selling Features
Permissions should be enforced server-side rather than relying only on hiding interface elements.
Vendor Data Security
Vendor applications may contain sensitive information.
Protect data with:
- HTTPS
- Role-Based Access
- Capability Checks
- Secure File Uploads
- Strong Authentication
- Restricted Admin Access
- Audit Logs
- Secure APIs
One vendor should never be able to access another vendor’s private application information.
Vendor Approval Audit Trail
Important administrative actions should be traceable.
Record events such as:
- Application Submitted
- Email Verified
- Status Changed
- Information Requested
- Document Reviewed
- Vendor Approved
- Vendor Rejected
- Vendor Suspended
An audit trail makes it easier to investigate disputes and administrative decisions.
Vendor Approval Analytics
Track metrics such as:
- Total Applications
- Approval Rate
- Rejection Rate
- Average Approval Time
- Application Abandonment
- Verification Completion Rate
- Time to First Product
- Time to First Sale
These metrics can identify bottlenecks in the onboarding process.
Improving Vendor Approval Speed
A marketplace should avoid unnecessary administrative delays.
Improve the process by:
- Using Clear Forms
- Validating Information Automatically
- Using Multi-Step Registration
- Providing Application Status
- Automating Notifications
- Creating Admin Review Queues
- Providing Clear Rejection Reasons
- Allowing Vendors to Correct Missing Information
The goal is to make legitimate vendor approval efficient without removing necessary controls.
Mobile-Friendly Vendor Approval
Vendor registration and onboarding should work well on mobile devices.
Test:
- Registration
- Document Upload
- Verification
- Application Status
- Store Setup
- Product Submission
Administrators should also be able to review critical vendor information comfortably on smaller screens if mobile administration is part of the workflow.
Custom Dokan Development
Some marketplace businesses require approval functionality beyond standard configuration.
Custom development can support:
- Custom Vendor Fields
- Multi-Step Registration
- Custom Approval Statuses
- Document Verification
- Admin Review Dashboard
- Approval Rules
- Conditional Workflows
- Automated Notifications
- External Verification APIs
- Vendor Scoring
Custom code should be modular and documented so future Dokan or WordPress updates are easier to manage.
API-Based Vendor Approval
Enterprise marketplaces may integrate external systems into the approval workflow.
For example:
Vendor Registration → WordPress → Verification API → Result → Dokan Vendor Status
Potential integrations include:
- Business Verification
- Address Verification
- Tax Validation
- Identity Verification
- Payment Account Verification
API integrations should include proper authentication, validation, logging, rate limiting, and error handling.
Vendor Approval & CRM
Approved vendor information can be synchronized with a CRM.
Potential data includes:
- Vendor Name
- Company
- Vendor Type
- Approval Status
- Registration Date
- Verification Status
This can support vendor relationship management and onboarding campaigns.
Vendor Approval & Communication
A communication system can allow administrators to contact vendors during review.
Useful communication topics include:
- Missing Information
- Verification Questions
- Application Status
- Product Requirements
- Store Setup
- Marketplace Policies
Clear communication can reduce support requests and application abandonment.
Testing the Vendor Approval Workflow
Before launching, test the complete process.
Test 1: New Registration
Verify that the vendor enters the correct initial state.
Test 2: Email Verification
Verify that confirmation changes the appropriate status.
Test 3: Admin Approval
Verify that approval grants the correct vendor permissions.
Test 4: Rejection
Verify that rejected vendors cannot access restricted functionality.
Test 5: Additional Information
Verify that vendors can provide missing information and return to review.
Test 6: Suspension
Verify that suspended vendors lose the intended marketplace capabilities.
Test 7: Product Approval
Verify that product approval is independent when required.
Test 8: Notifications
Verify every important status-change email.
Common Vendor Approval Mistakes
Approving Vendors Automatically Without Considering Risk
Not every marketplace should use the same approval model.
No Clear Status
Vendors should know whether their application is pending, under review, approved, or requires action.
Manual Communication Everywhere
Automate predictable notifications.
Poor Permission Controls
Approval status must be enforced through server-side permissions.
No Audit Trail
Important approval decisions should be traceable.
Excessive Verification
Unnecessary requirements can discourage legitimate vendors.
Dokan Vendor Approval Checklist
Registration
- Vendor Registration
- Required Fields
- Email Verification
- Business Information
- Mobile-Friendly Form
Review
- Pending Status
- Under Review Status
- Additional Information Status
- Admin Review
- Admin Notes
- Document Review
Approval
- Approve Vendor
- Reject Vendor
- Suspend Vendor
- Status Notifications
- Correct Permissions
Store Activation
- Store Setup
- Store Profile
- Shipping
- Payment Settings
- Product Submission
Security
- Access Control
- Capability Checks
- Secure File Upload
- Audit Logs
- API Security
Analytics
- Approval Rate
- Rejection Rate
- Approval Time
- Verification Completion
- Application Abandonment
Best Practices
- Define vendor statuses before development.
- Keep approval rules documented.
- Use appropriate verification based on vendor risk.
- Provide vendors with clear application status.
- Automate routine notifications.
- Keep sensitive vendor documents restricted.
- Separate vendor approval from product approval when appropriate.
- Maintain an audit trail for important decisions.
- Use server-side permission checks.
- Test approval, rejection, suspension, and re-verification workflows.
- Regularly review the onboarding process to remove unnecessary friction.
Final Thoughts
A well-designed Dokan Marketplace Vendor Approval Workflow gives marketplace owners better control over who can sell on the platform and when they can access marketplace functionality.
The strongest workflow combines registration, verification, application review, approval, store setup, product review, notifications, permissions, and ongoing vendor management.
For larger marketplaces, custom Dokan development can extend the workflow with document verification, external APIs, automated rules, CRM integrations, analytics, and specialized admin dashboards.
The objective should not be to make vendor approval as complicated as possible. Instead, the goal is to create a process that is secure, transparent, efficient, and appropriate for the marketplace’s business model.
When legitimate vendors can move quickly through a clear approval process—and administrators have the tools to identify and manage higher-risk applications—the marketplace can grow while maintaining quality and trust.

Hire Me on Upwork – Dokan & WooCommerce Expert

 Chat on WhatsApp