

Launching a multivendor marketplace is exciting — but also risky if you miss critical setup steps.
A marketplace is more complex than a normal store because you manage:
-
Vendors
-
Products
-
Commissions
-
Shipping
-
Withdrawals
-
Disputes
-
Payments
If even one system is misconfigured, your launch can turn chaotic.
This guide gives you a complete Dokan marketplace launch checklist, so you can go live confidently without missing anything.
🔴 Why You Need a Launch Checklist
Without a structured checklist:
❌ Vendors cannot withdraw
❌ Shipping doesn’t calculate properly
❌ Commission miscalculates
❌ Refunds break
❌ Customers lose trust
👉 A checklist prevents costly mistakes.
🧱 Phase 1: Foundation Setup
Before vendor onboarding, ensure your technical base is solid.
✔ Hosting & Performance
-
High-performance hosting
-
SSL certificate installed
-
Caching configured
-
Image optimization enabled
-
Backup system active


Marketplace sites require stronger infrastructure than regular blogs.
✔ Core Installation
-
WordPress installed
-
WooCommerce configured
-
Dokan Pro installed
-
Required Dokan modules activated
Verify:
-
Permalinks structure
-
Timezone & currency
-
Email settings
⚙ Phase 2: Marketplace Configuration
Now configure Dokan properly.
✔ Vendor Registration Settings
-
Enable manual vendor approval
-
Configure vendor registration form
-
Require business details
-
Enable email verification
Test vendor signup before launch.
✔ Commission Structure
Define:
-
Global commission rate
-
Category-based commission (if needed)
-
Vendor-specific commission overrides
Double-check:
✔ Commission calculation
✔ Admin earnings
✔ Vendor earnings
✔ Vendor Dashboard Setup
Verify:
-
Vendors can add products
-
Vendors can edit products
-
Vendors can view orders
-
Vendors can request withdrawals
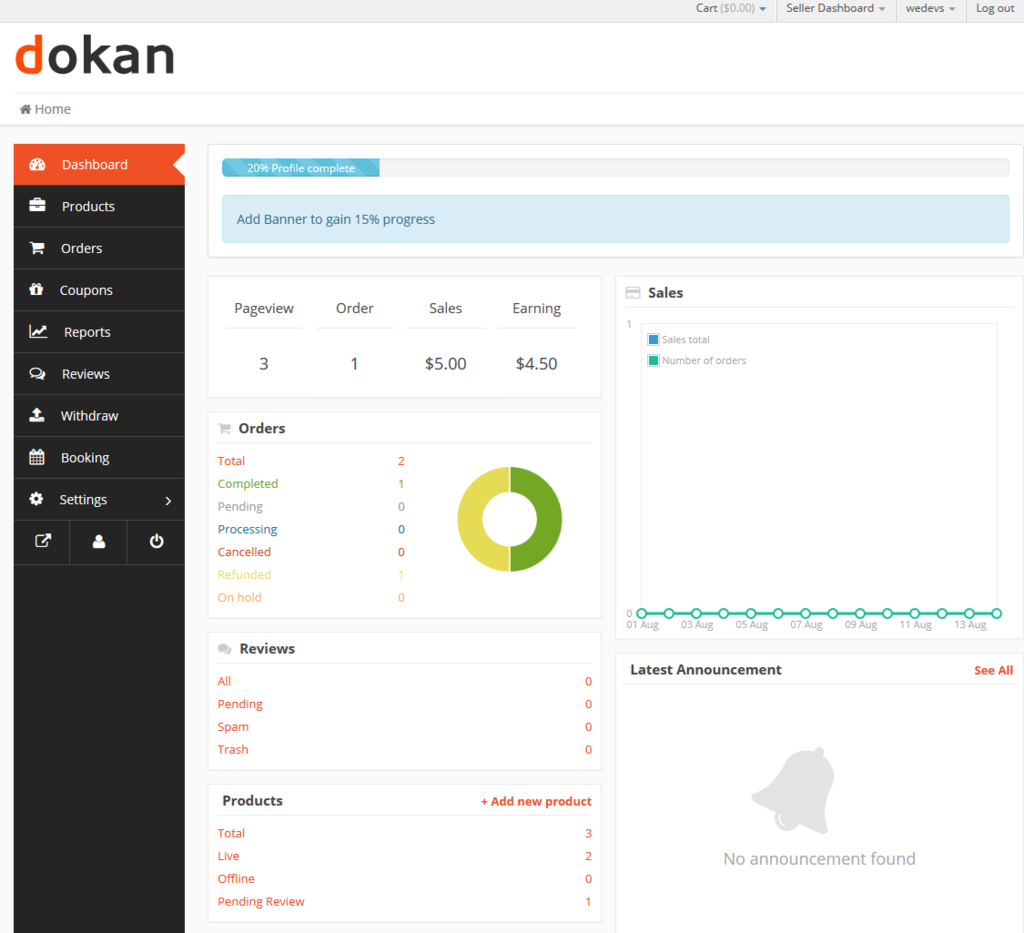
Test using a dummy vendor account.
💳 Phase 3: Payment & Withdrawal Setup
Payment issues at launch damage trust immediately.
✔ Payment Gateway Configuration
-
Stripe / Razorpay / PayPal configured
-
Test payments completed
-
Webhooks configured
-
Refund system tested
Test:
✔ Successful payment
✔ Failed payment
✔ Refund process
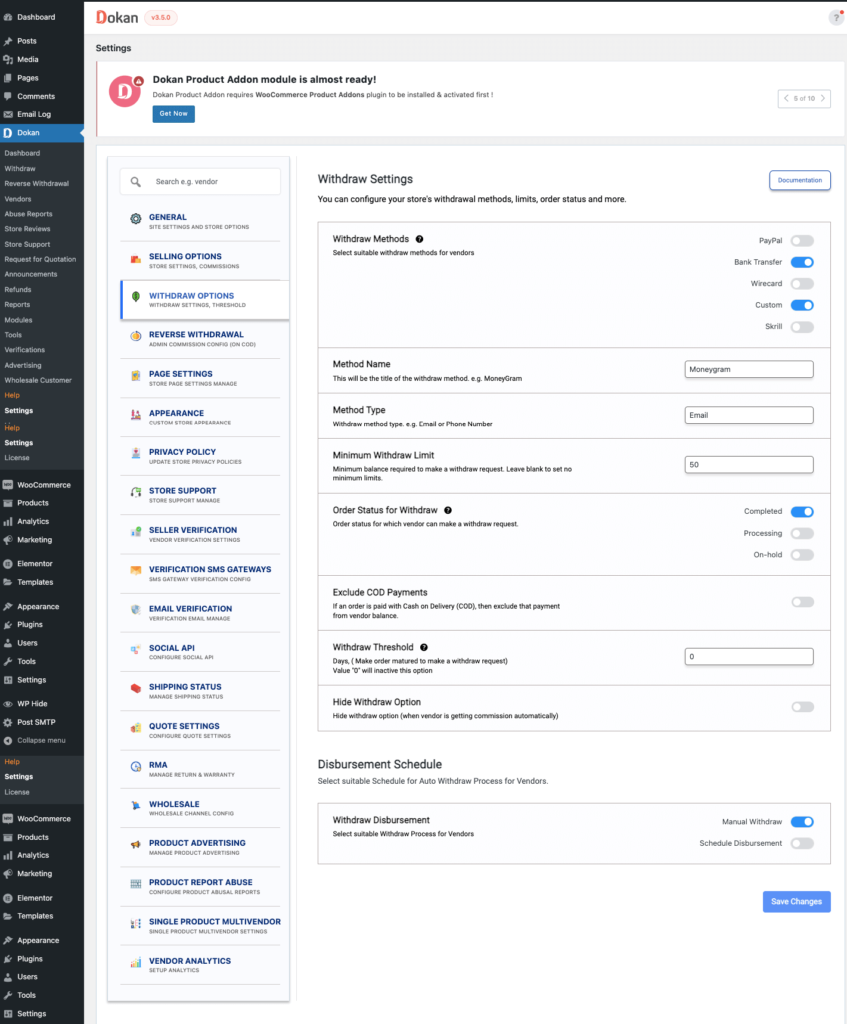
✔ Vendor Withdrawal System
Define:
-
Minimum withdrawal amount
-
Withdrawal methods
-
Withdrawal schedule
-
Admin approval requirement
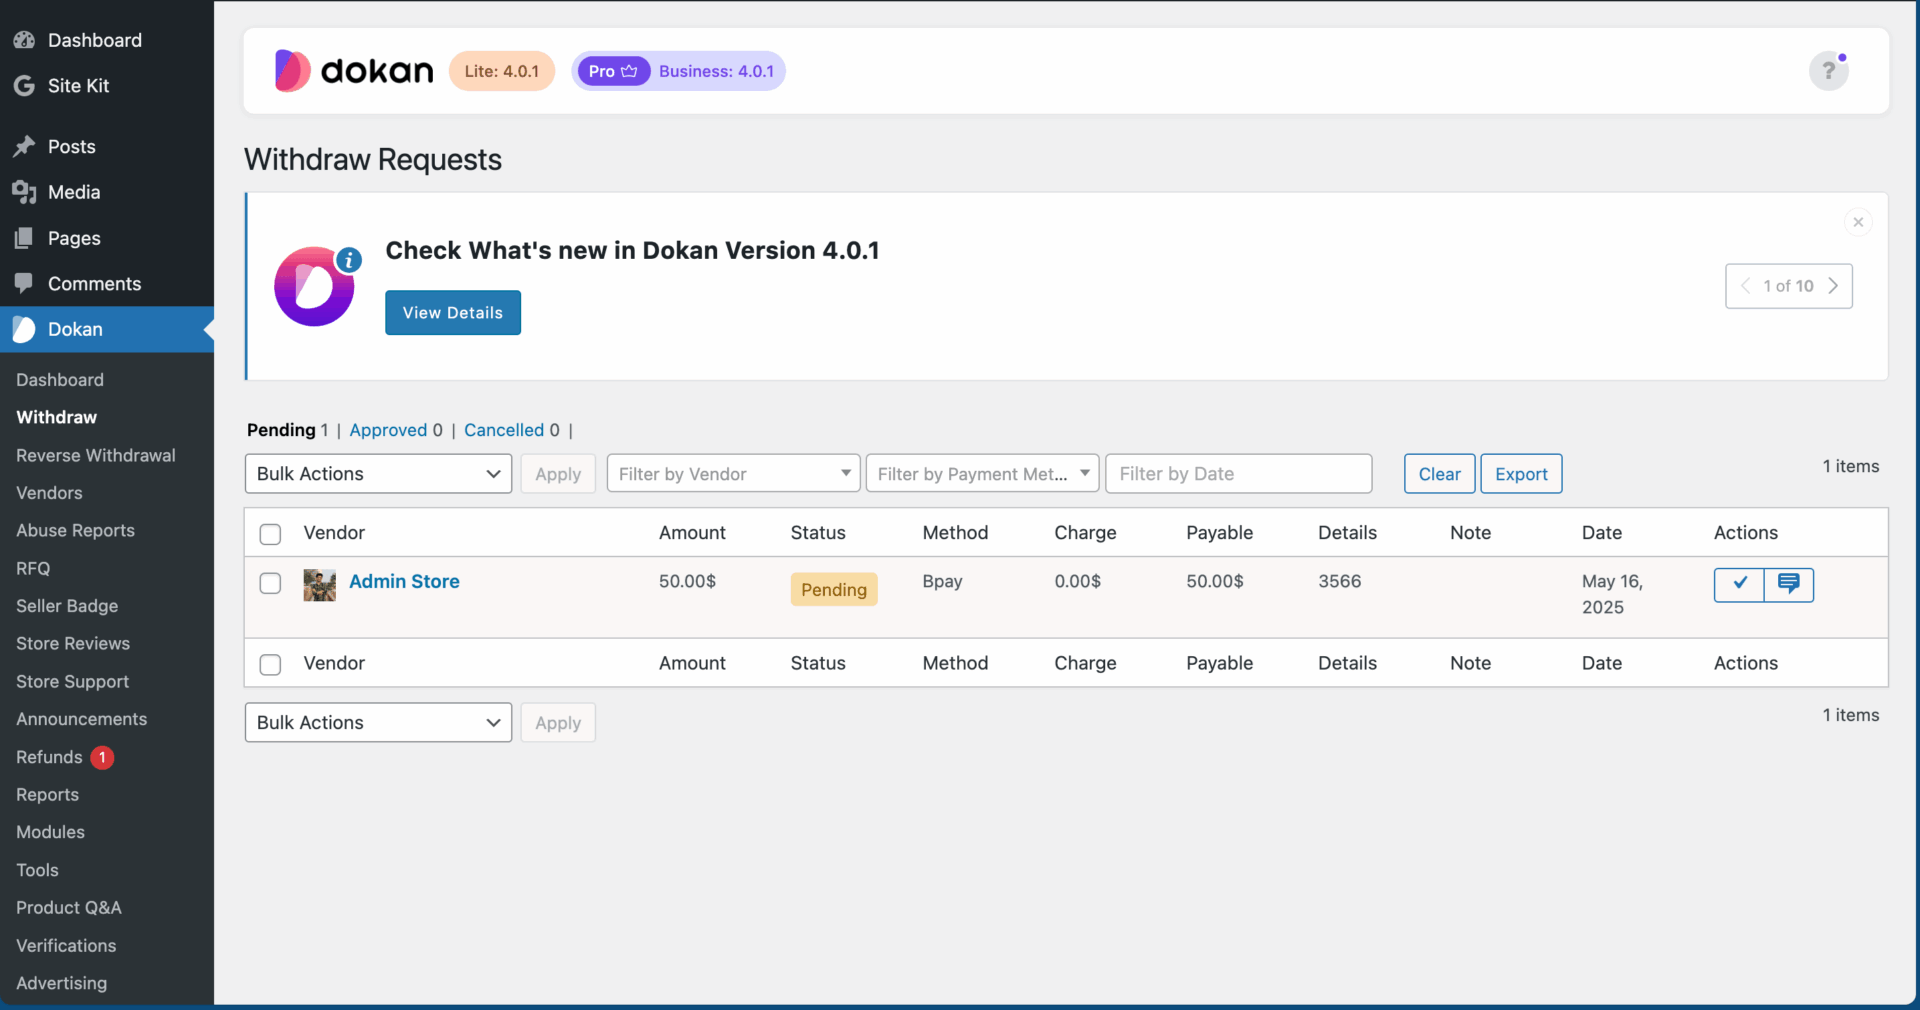
Test:
✔ Withdrawal request
✔ Approval flow
✔ Balance updates

📦 Phase 4: Shipping & Tax Setup
Shipping confusion is the #1 cause of complaints.
✔ Shipping Configuration
-
Global shipping zones configured
-
Vendor shipping enabled
-
Test different locations
-
Confirm shipping cost calculation
Test checkout for:
-
Local orders
-
International orders
-
Different product types
✔ Tax Configuration
-
Set tax rates
-
Region-specific tax rules
-
Test tax calculation
-
Verify tax reports
🛒 Phase 5: Product & Content Review
Before launch, review everything.
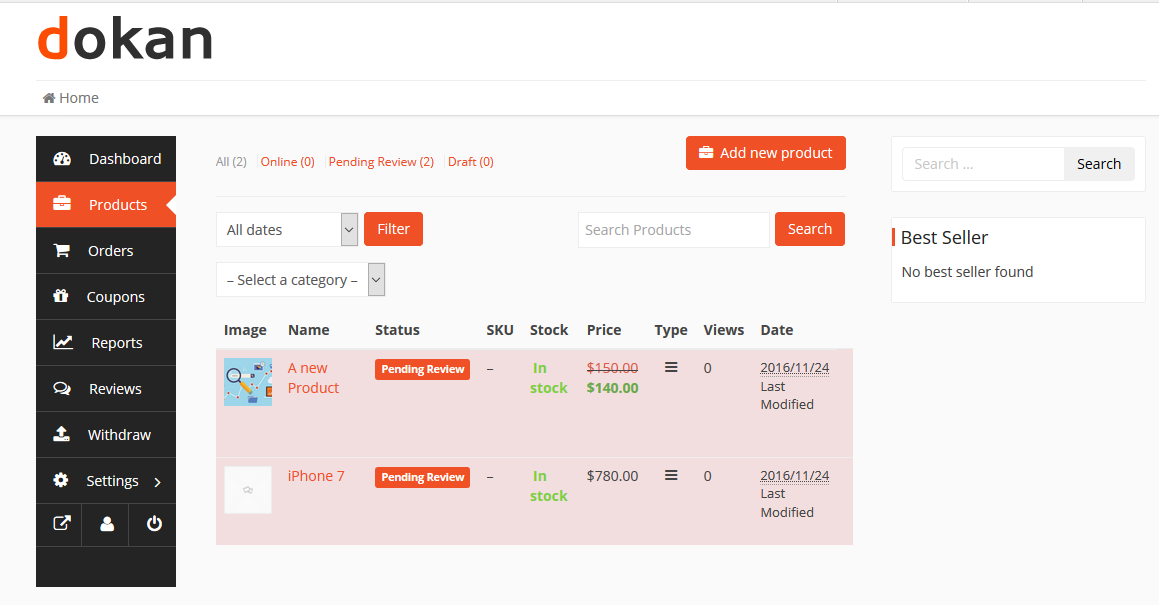
✔ Product Review
Check:
-
Product titles
-
Descriptions
-
Images quality
-
Pricing accuracy
-
Stock management
-
Categories
Reject low-quality listings before public launch.
✔ Legal Pages
Ensure these pages exist:
-
Terms & Conditions
-
Privacy Policy
-
Refund Policy
-
Vendor Terms
-
Shipping Policy
These protect your business legally.
📊 Phase 6: Analytics & Monitoring
Launch without analytics = blind growth.
✔ Analytics Setup
-
Google Analytics connected
-
Conversion tracking active
-
eCommerce tracking enabled
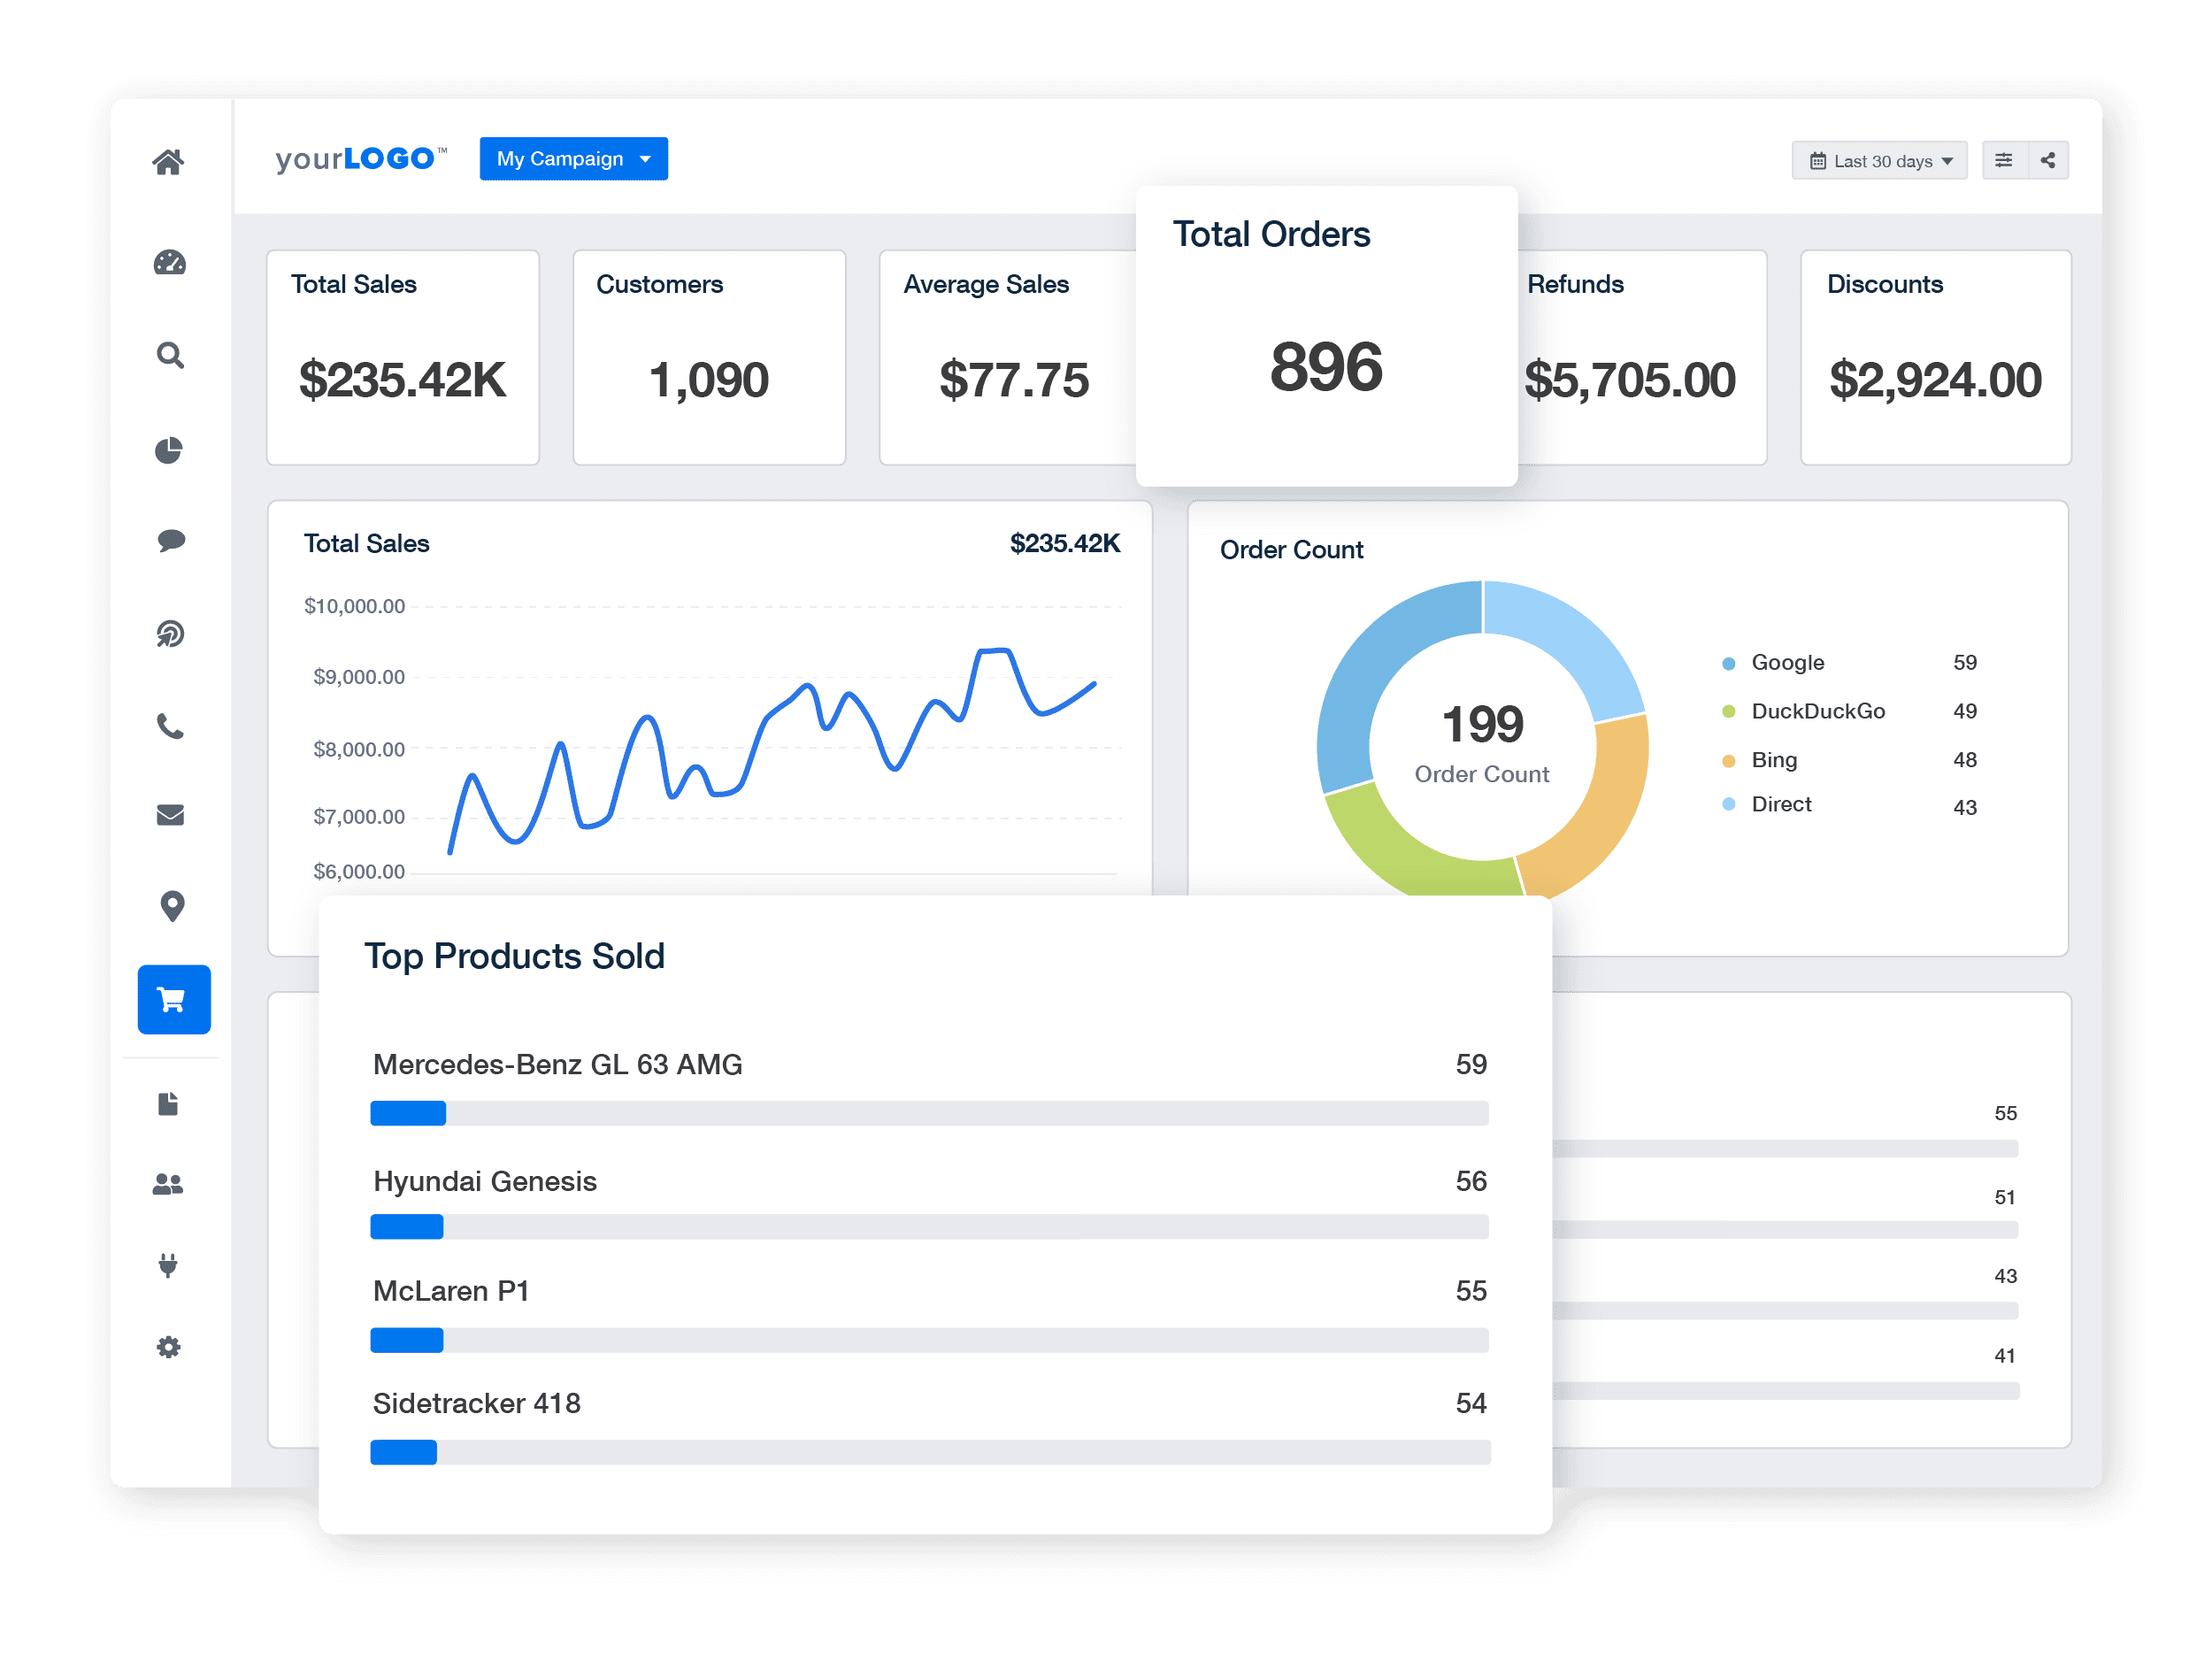
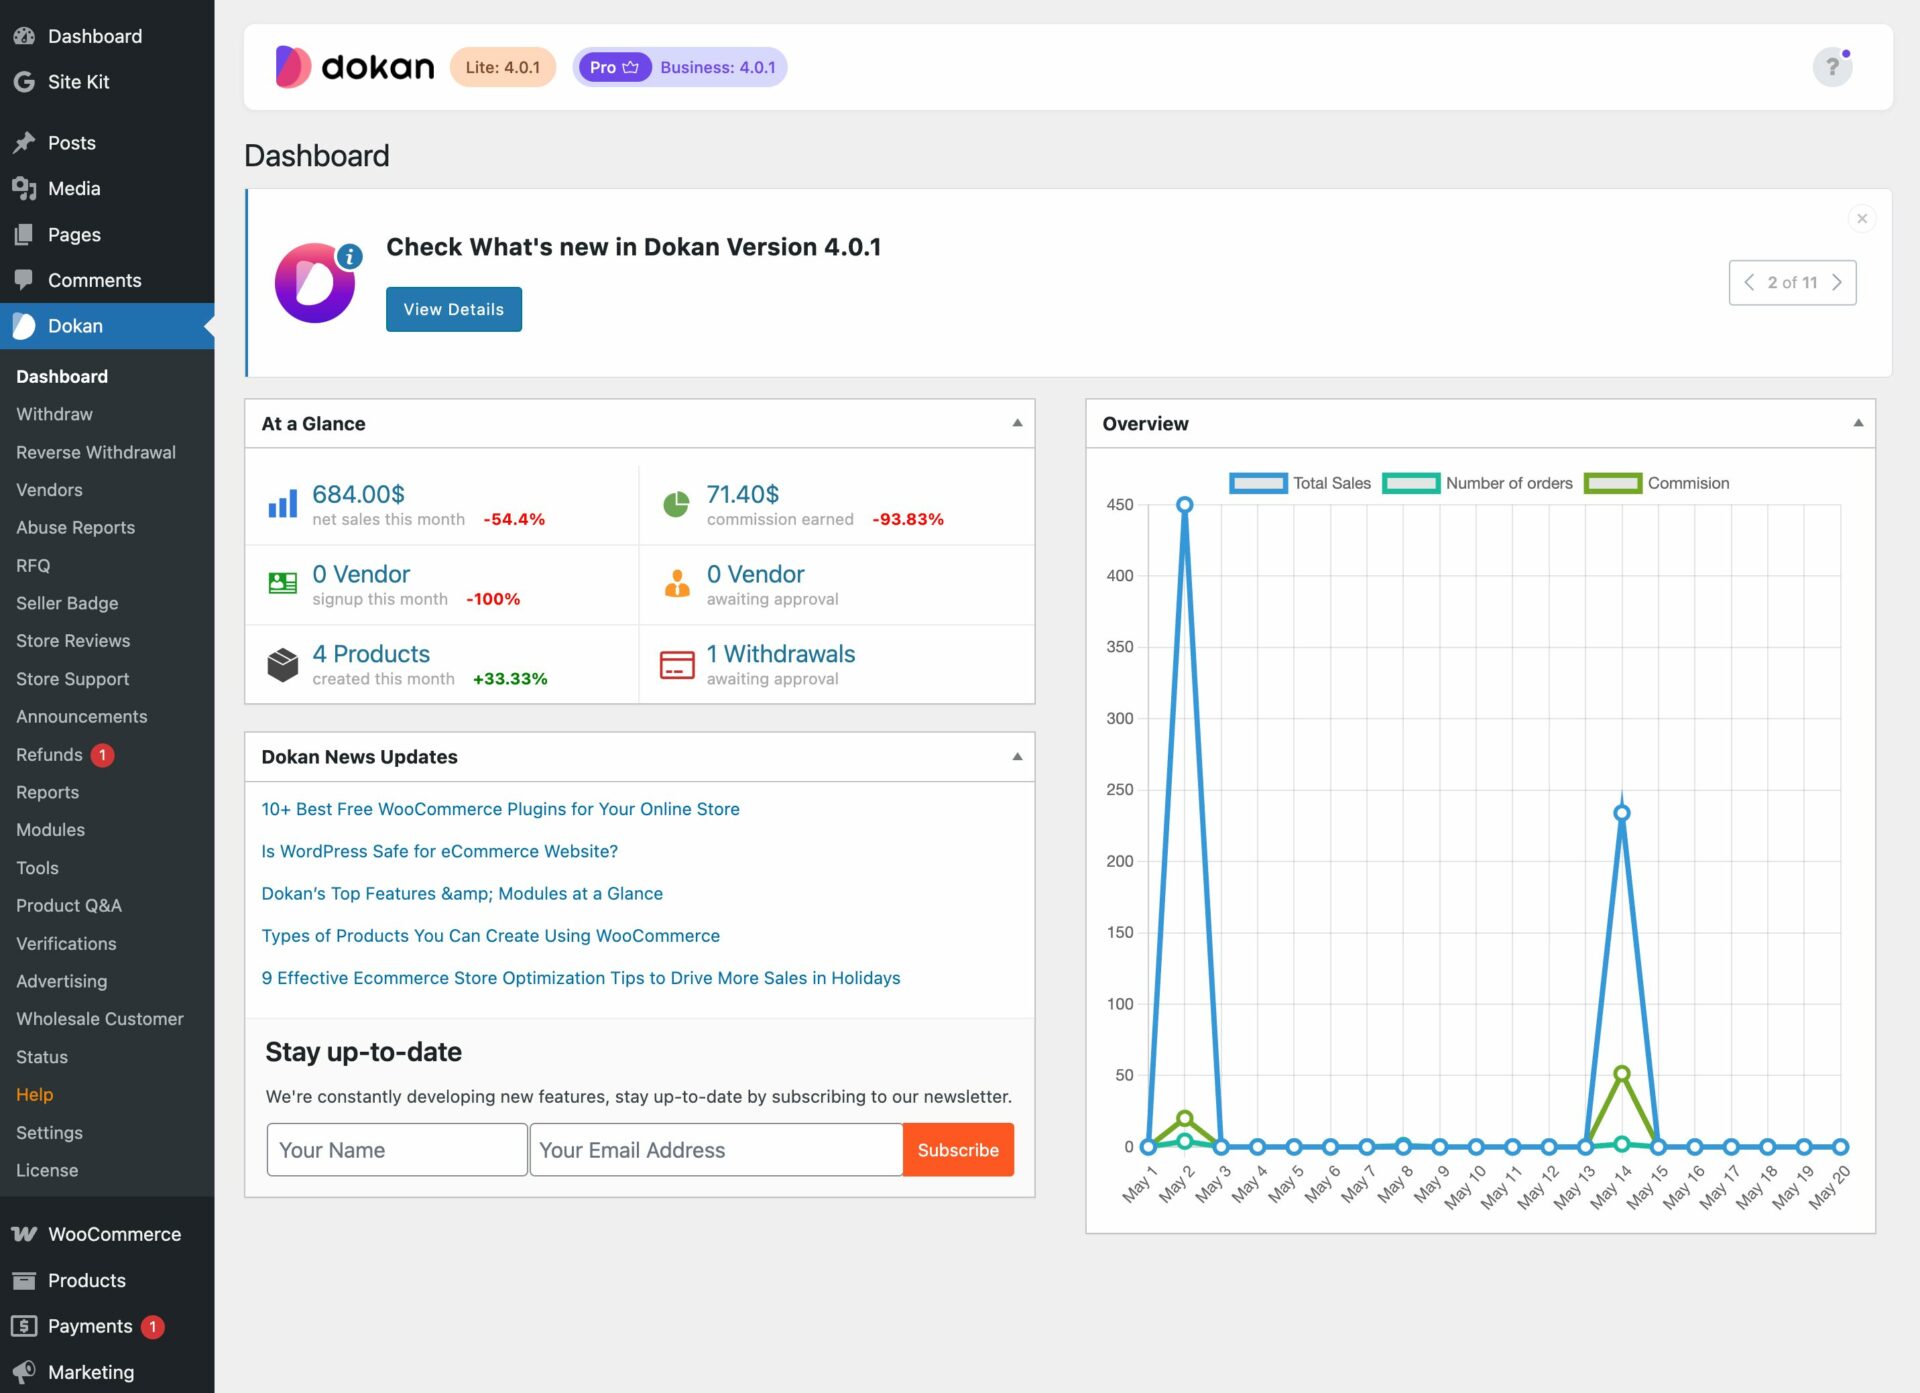
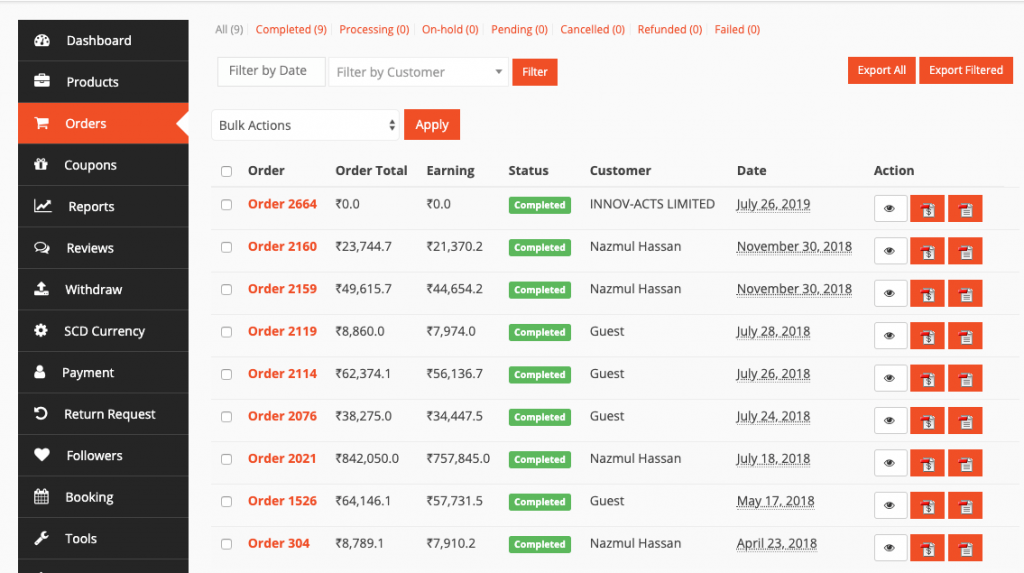
✔ Reporting & Monitoring
Verify:
-
Sales reports
-
Commission reports
-
Refund tracking
-
Vendor performance reports
Plan weekly reporting schedule.
🔐 Phase 7: Security & Backup
Marketplace = high risk target.
✔ Security Checklist
-
Strong passwords
-
Two-factor authentication
-
Login protection
-
Firewall enabled
-
Malware scan configured
✔ Backup Checklist
-
Daily automatic backup
-
Off-site storage
-
Manual backup before launch
-
Restore test completed
Never launch without verified backups.
🧪 Phase 8: Full Testing Before Launch
Before going public:
Run Full Test Scenarios:
✔ Vendor registration
✔ Product submission
✔ Order placement
✔ Refund process
✔ Withdrawal process
✔ Subscription (if enabled)
✔ Mobile responsiveness
Test on:
-
Desktop
-
Mobile
-
Different browsers
👉 Soft-launch privately before public announcement.
🚀 Phase 9: Launch Strategy
Don’t just publish and hope.
✔ Vendor Onboarding
-
Send vendor guidelines
-
Provide tutorial resources
-
Share commission structure clearly
✔ Customer Announcement
-
Email marketing campaign
-
Social media announcement
-
Limited-time launch offers
Plan growth strategy from day one.
🚨 Common Marketplace Launch Mistakes
❌ Skipping vendor approval setup
❌ Not testing withdrawals
❌ Weak hosting
❌ No refund system testing
❌ No analytics
These mistakes cause early failure.
📈 After Launch: First 30 Days Checklist
✔ Monitor daily orders
✔ Track refunds
✔ Review vendor performance
✔ Adjust commission if needed
✔ Fix UX issues quickly
Early optimization determines long-term success.
📚 Also Read (Internal Links)

Hire Me on Upwork – Dokan & WooCommerce Expert
