
Building a multi-vendor marketplace is easy.
Making it profitable and scalable is the real challenge.
If you’re running a marketplace using Dokan with WooCommerce, then Vendor Subscription Plans are the best way to generate consistent revenue.
Instead of earning only commissions, you can:
✔ Charge vendors monthly/yearly
✔ Offer tier-based features
✔ Control product limits
✔ Monetize your platform like Amazon, Etsy, or Flipkart
In this complete guide, you’ll learn how to set up Dokan Vendor Subscription Plans step-by-step.
🔴 Why Vendor Subscription Plans Matter

Without subscription plans:
❌ Revenue depends only on sales
❌ Hard to scale marketplace
❌ Low-quality vendors join freely
❌ No control over vendor limits
With subscriptions:
✔ Predictable monthly income
✔ Better vendor quality
✔ Tier-based monetization
✔ Controlled growth
👉 Subscription model = stable business model
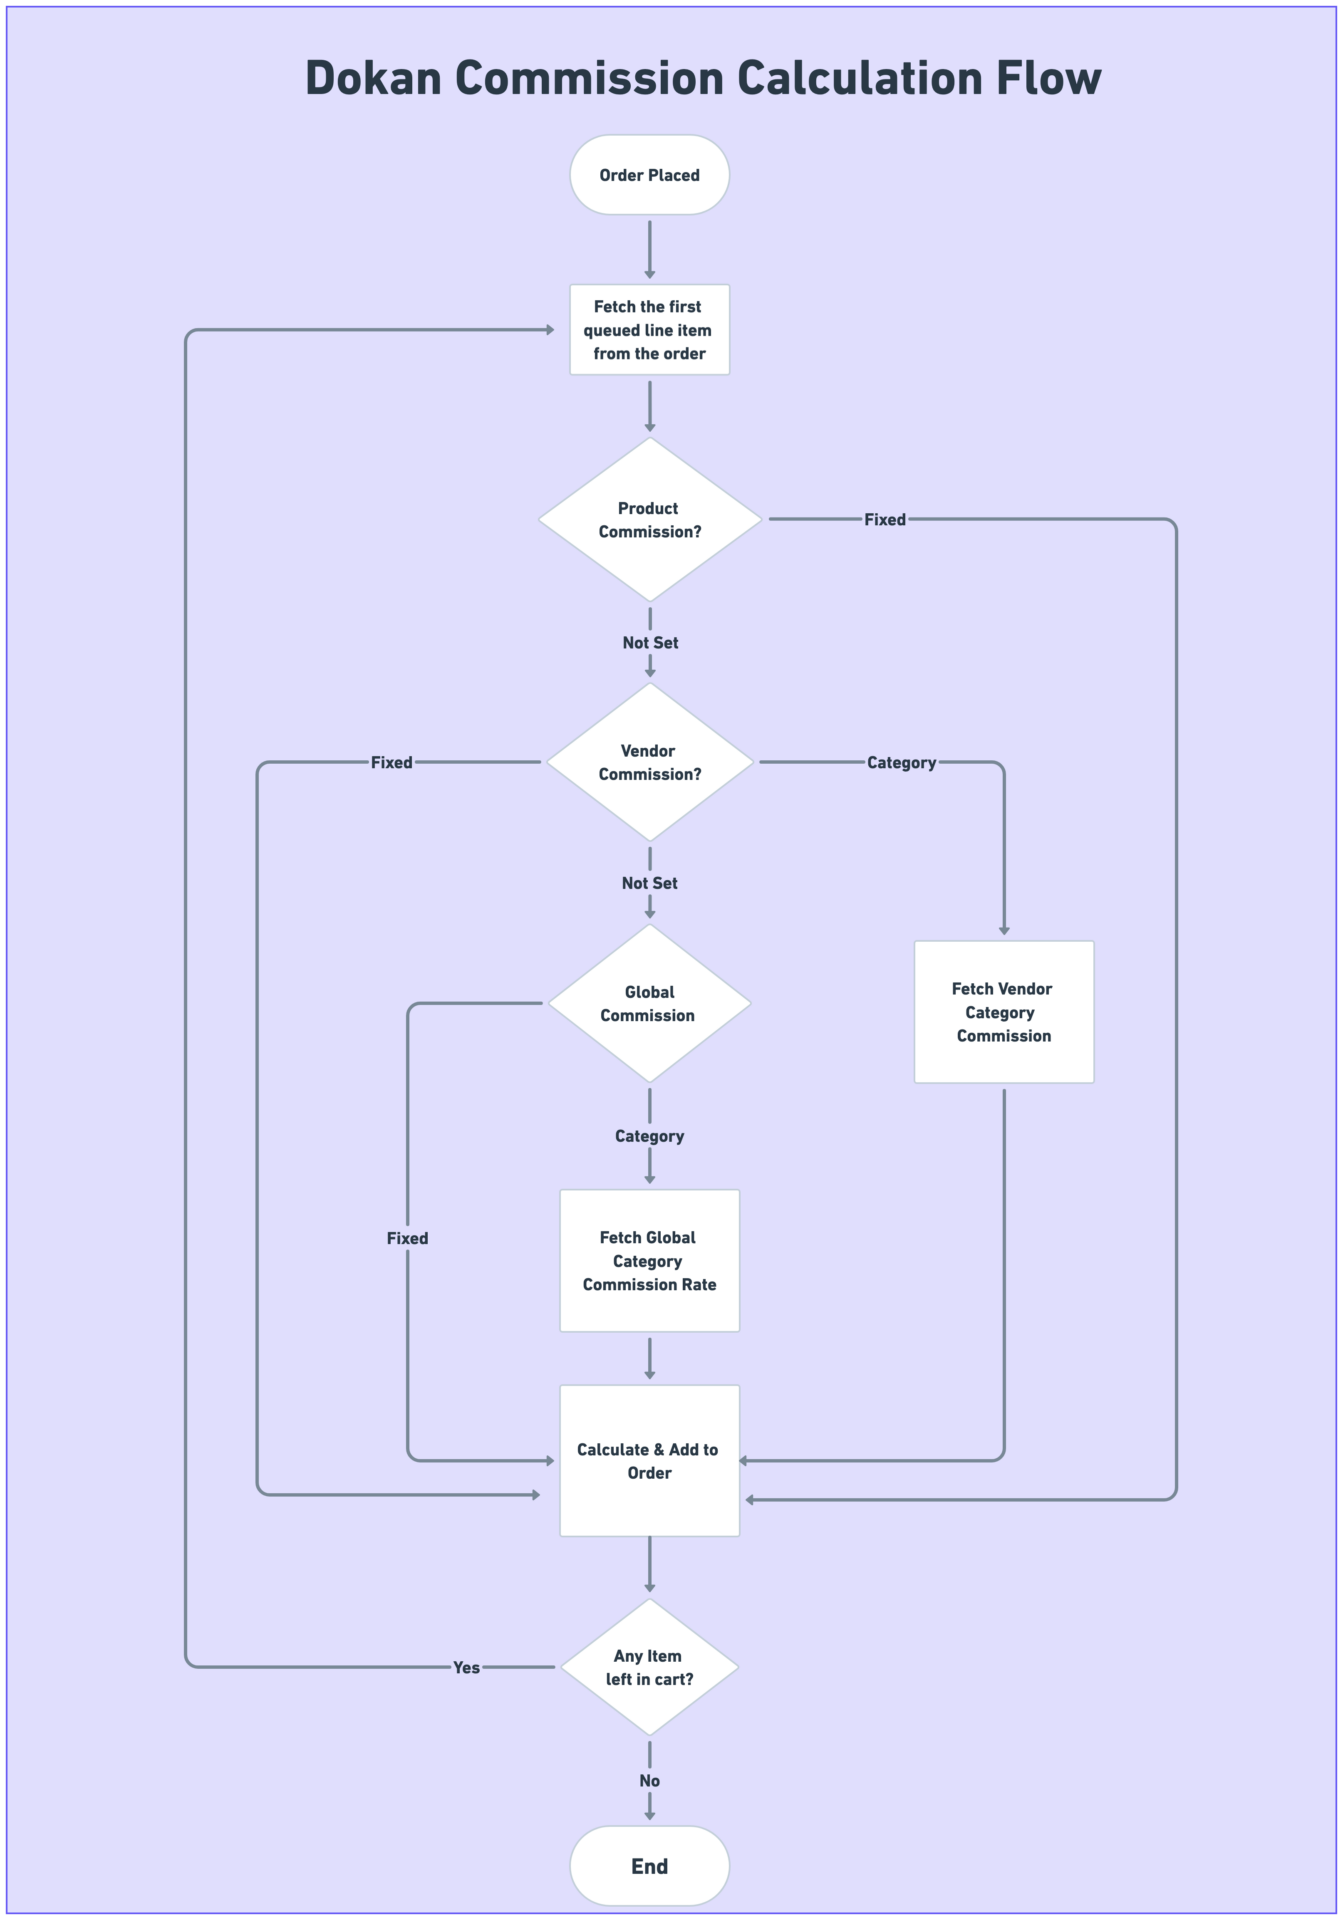
🧠 How Dokan Vendor Subscription Works
Dokan subscription system works like this:
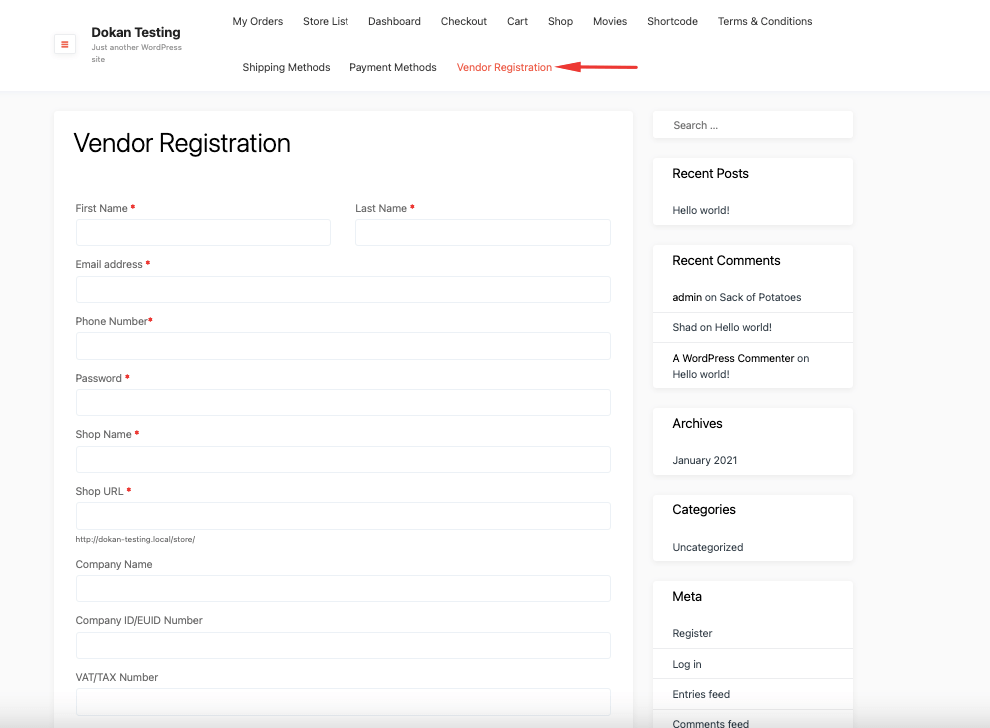
1️⃣ Vendor registers on your site
2️⃣ Vendor selects a subscription plan
3️⃣ Plan defines permissions
4️⃣ Vendor can add products based on plan limits
5️⃣ Subscription renews automatically
Plans can control:
-
Product limit
-
Commission type
-
Upload permissions
-
Listing duration
-
Featured products
📦 Requirements Before Setup
Before you start, ensure you have:
✔ Dokan Pro plugin
✔ Vendor Subscription module enabled
✔ WooCommerce installed
✔ Payment gateway configured
👉 Without Dokan Pro, subscription feature available nahi hota.
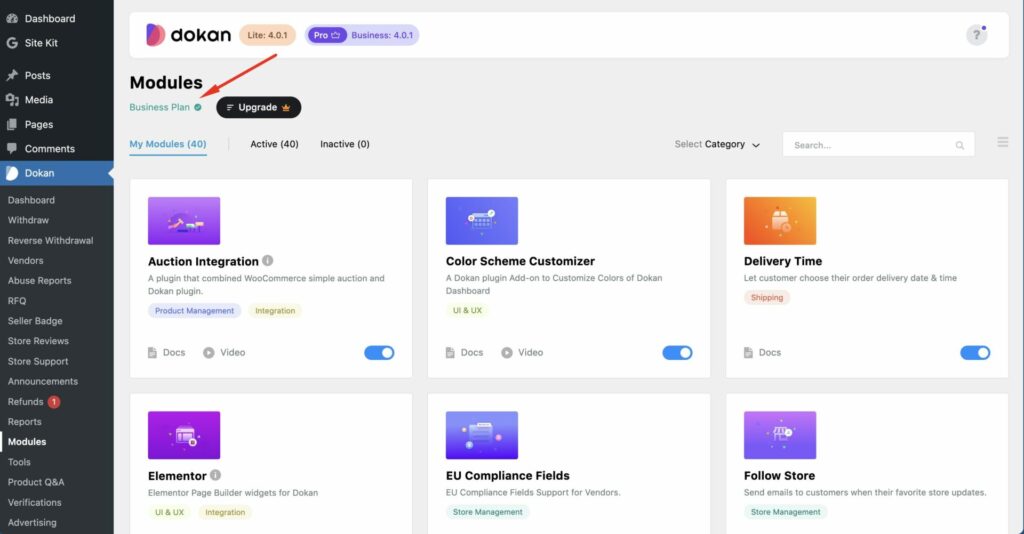
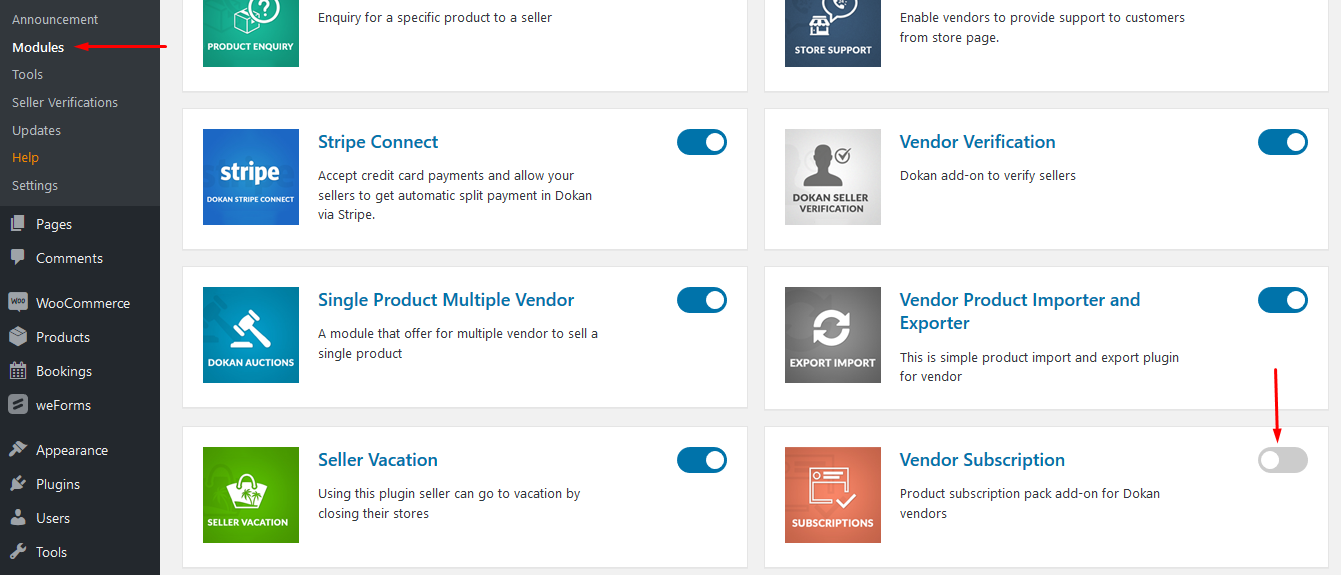
1️⃣ Enable Vendor Subscription Module
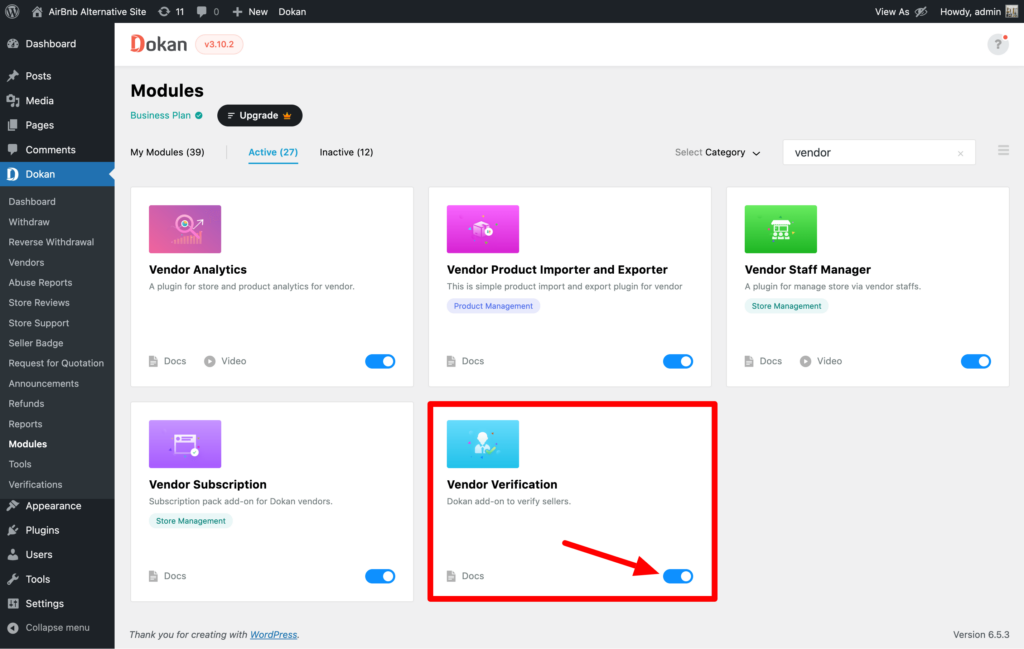
Steps:
✔ Go to Dokan → Modules
✔ Find “Vendor Subscription”
✔ Click Activate
Once enabled, subscription options appear in settings.
2️⃣ Configure Global Subscription Settings

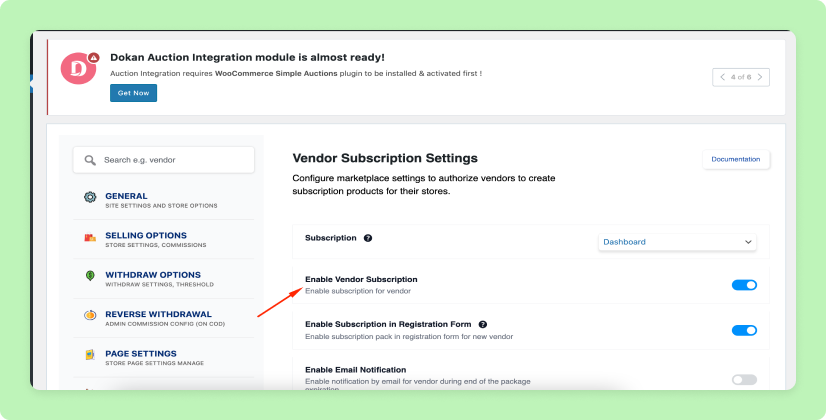
Go to:
Dokan → Settings → Selling Options
Important Settings:
✔ Enable Subscription for Vendors
✔ Force Subscription (Important)
✔ Disable product upload without plan
👉 Yeh ensure karta hai ki vendor bina plan ke product add na kare
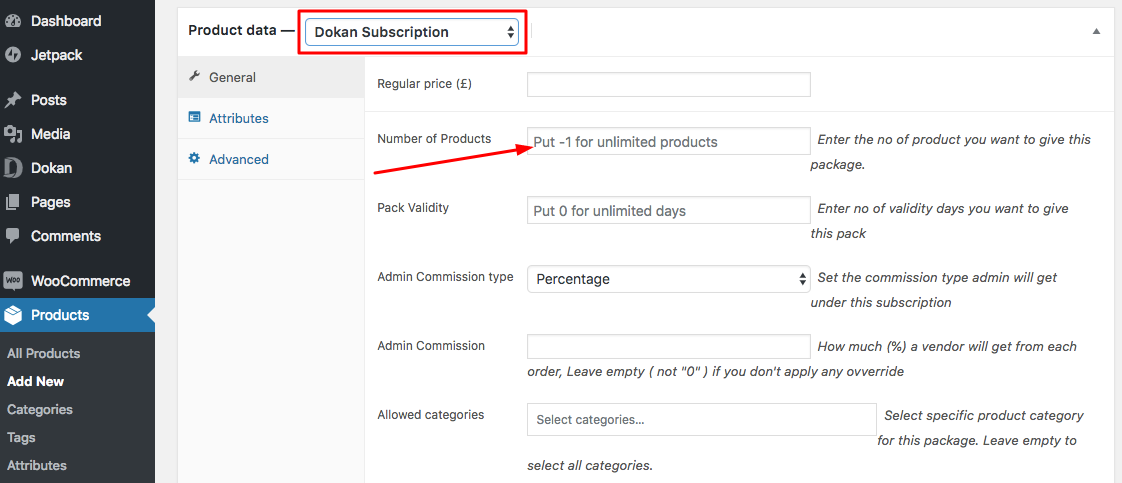
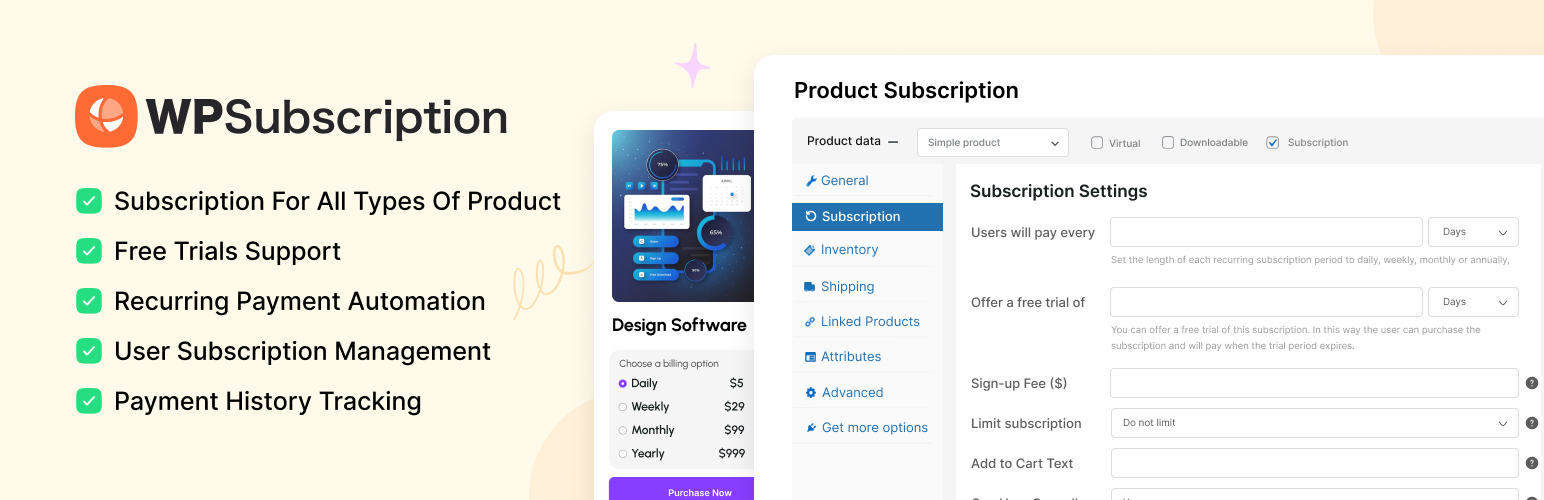
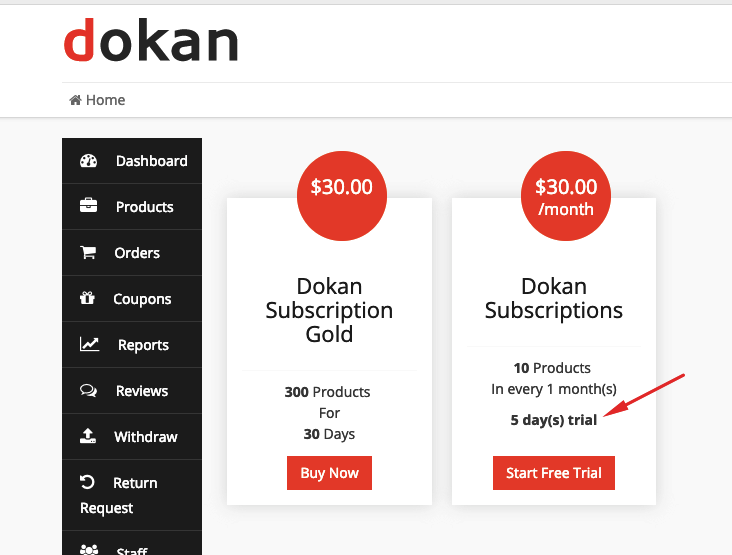
3️⃣ Create Vendor Subscription Products
Dokan subscription plans actually WooCommerce products hote hain.
Steps:
✔ Go to Products → Add New
✔ Select product type: Dokan Subscription
✔ Add plan name (Basic, Standard, Premium)
Configure:
-
Price (₹ / month / year)
-
Billing cycle
-
Product limit
-
Listing duration
-
Featured product support
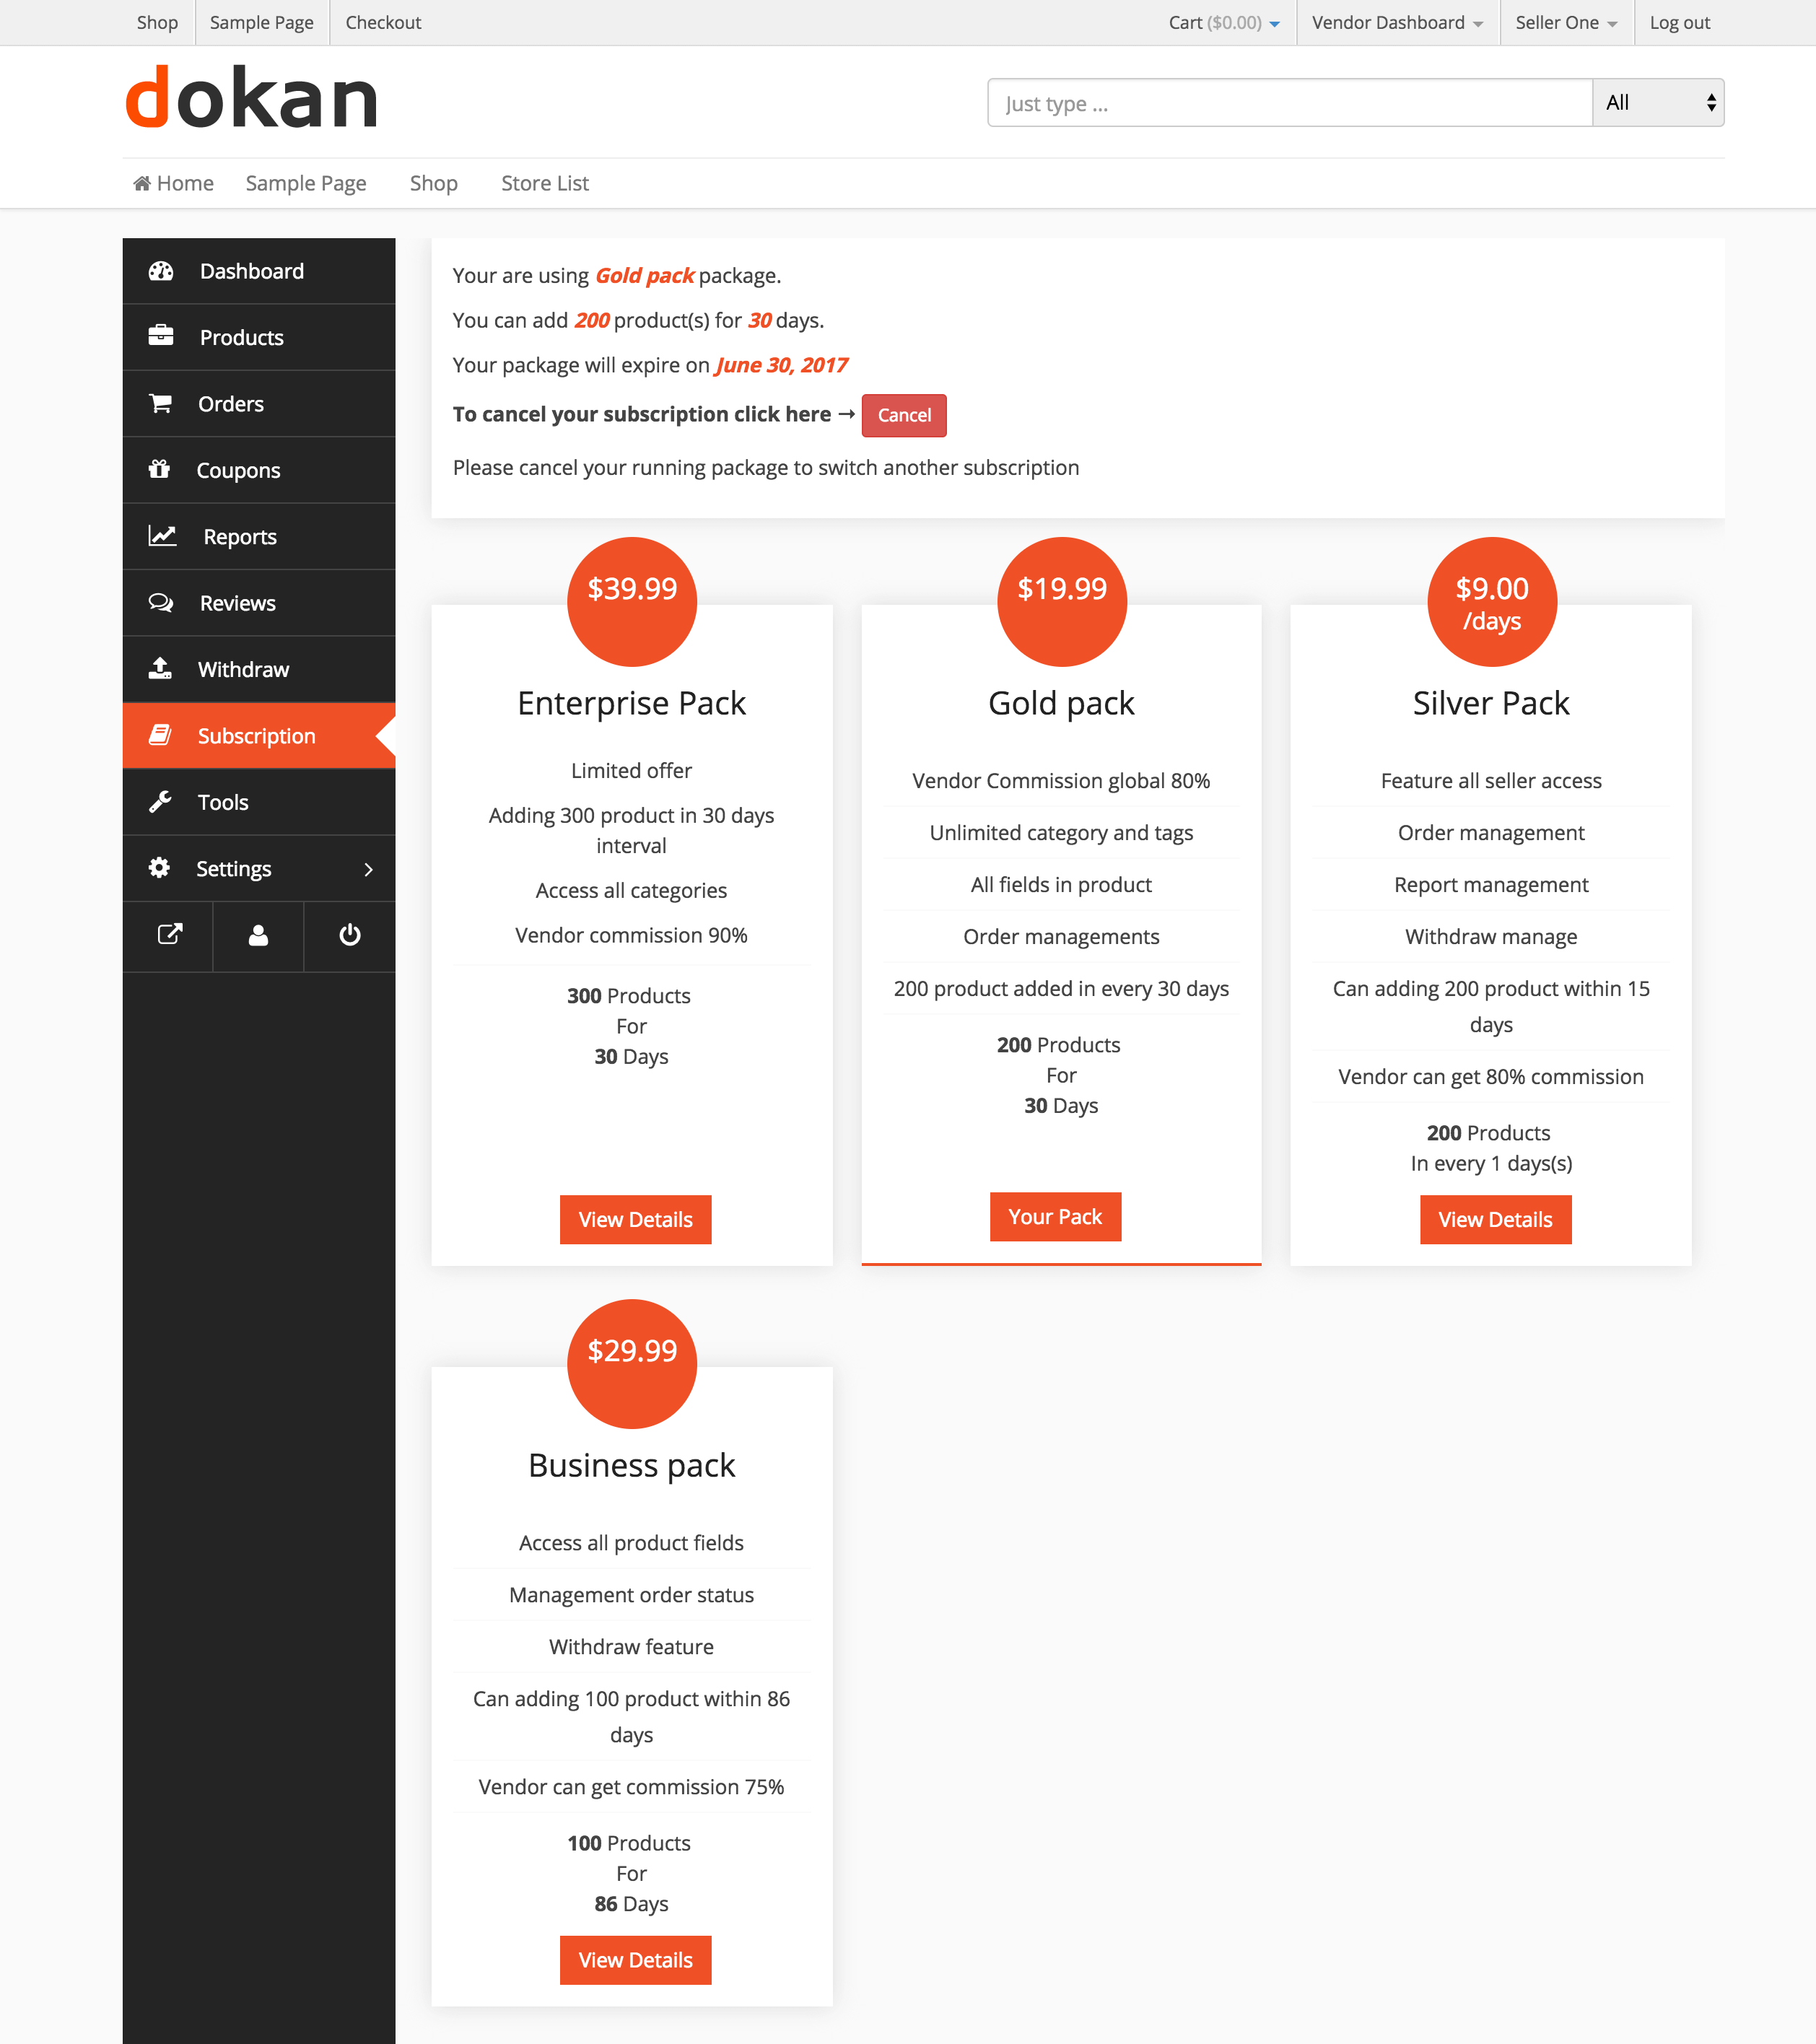
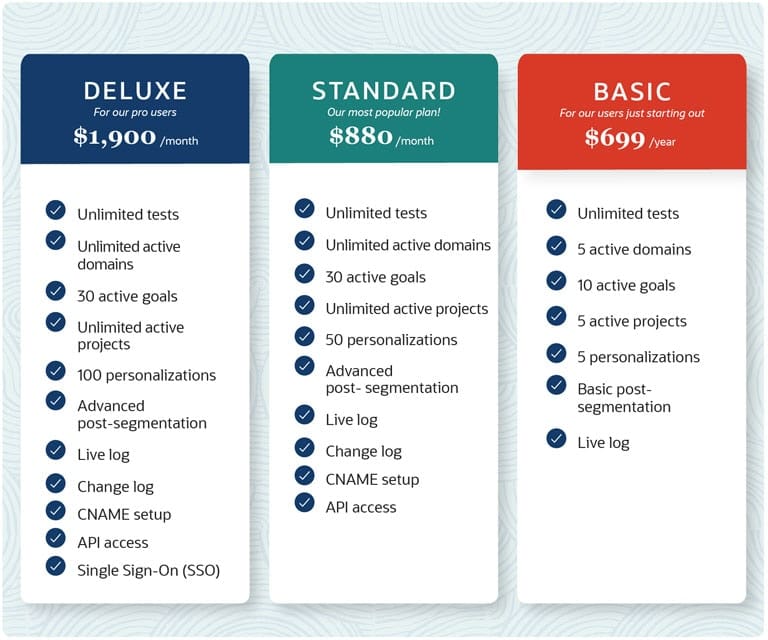
📌 Example Plans:
Basic Plan
-
₹499/month
-
10 products
Standard Plan
-
₹999/month
-
50 products
Premium Plan
-
₹1999/month
-
Unlimited products
4️⃣ Set Product Limits & Restrictions
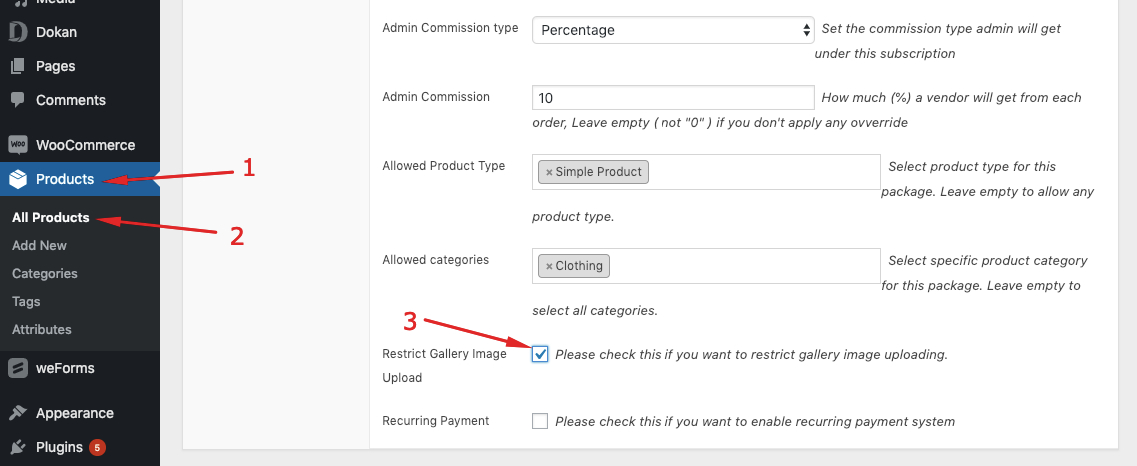
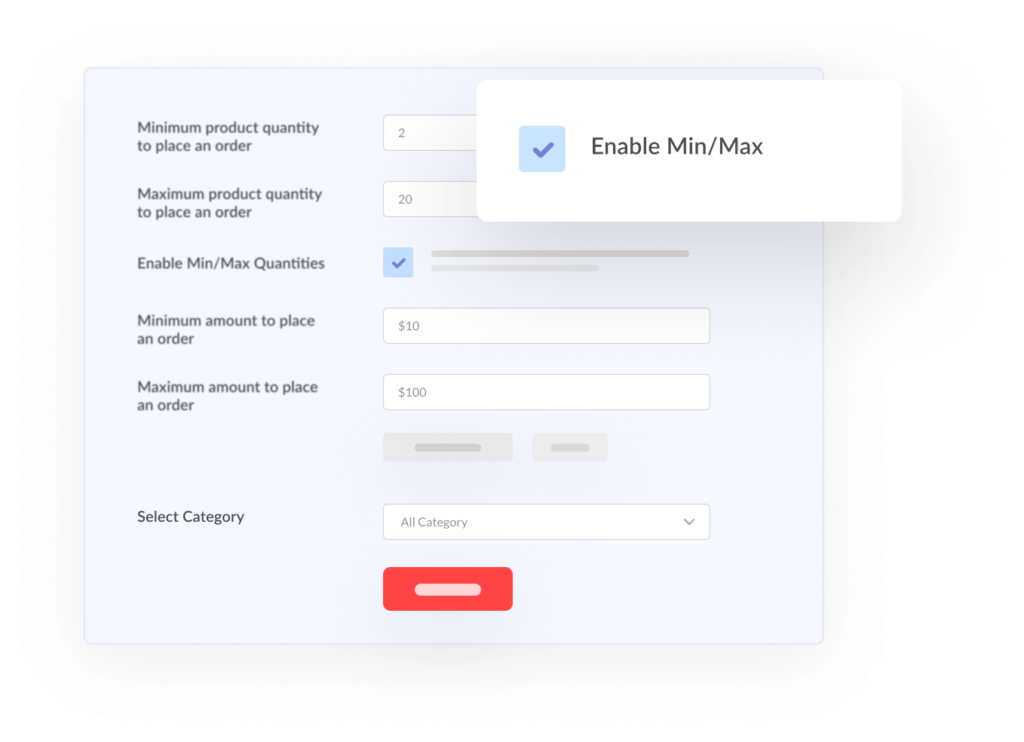
You can control:
✔ Number of products
✔ Downloadable products
✔ Auction products (if enabled)
✔ Booking products
👉 Helps avoid spam vendors and server overload.
5️⃣ Configure Commission Per Plan
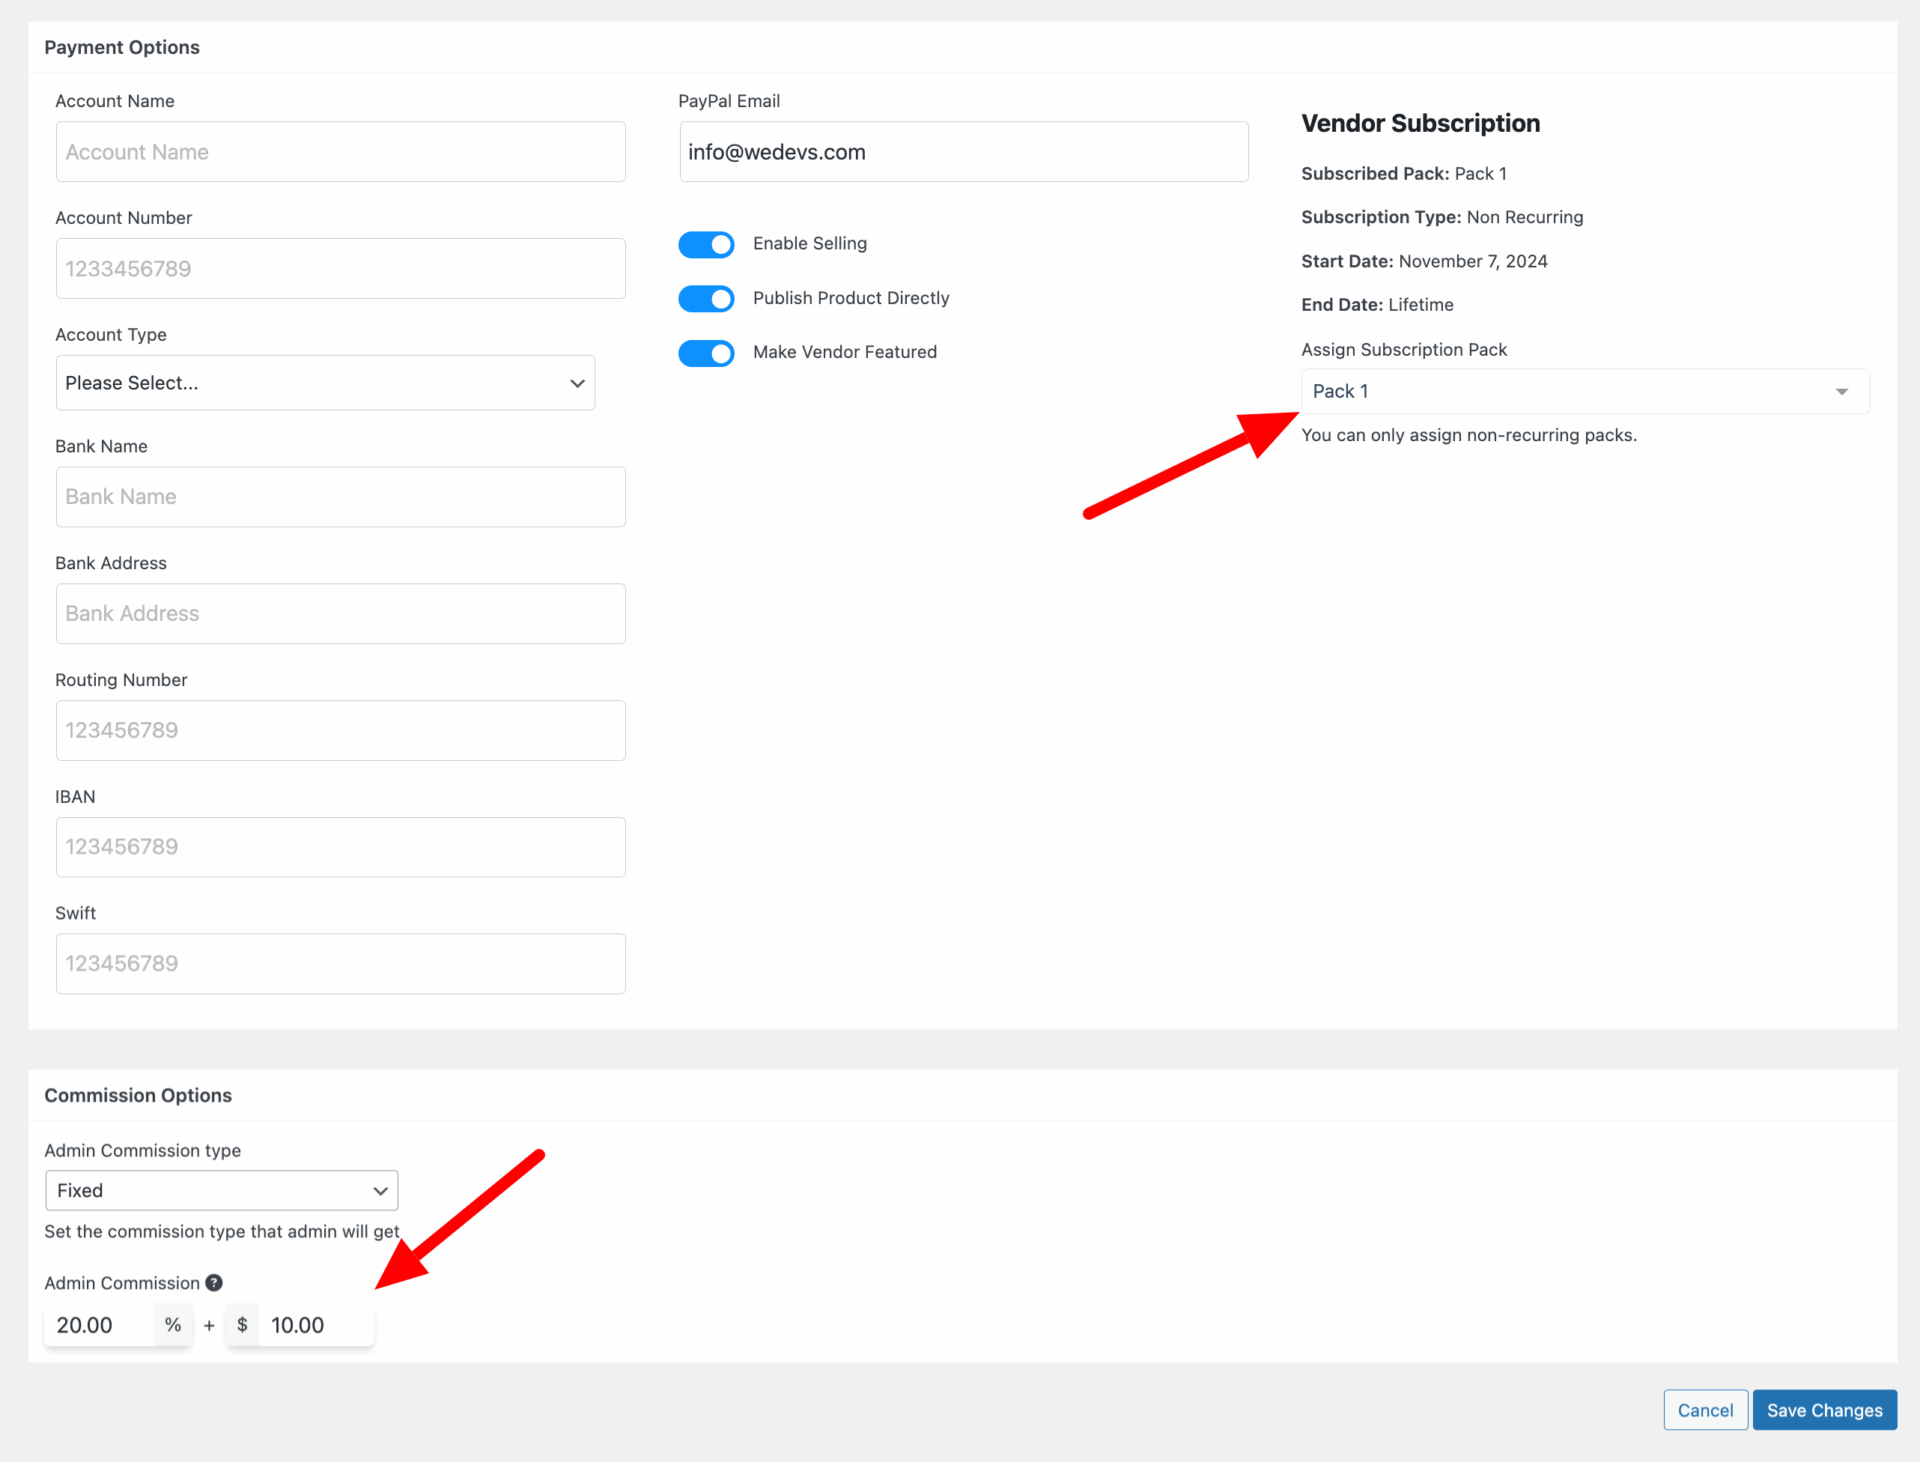
Different plans = different commission.
Example:
-
Basic → 20% commission
-
Premium → 10% commission
👉 Higher plan = lower commission = more incentive
📈 This increases upgrade rate
6️⃣ Enable Subscription Renewal & Expiry
Options:
✔ Auto-renew subscription
✔ Manual renewal
✔ Expiry restrictions
When plan expires:
❌ Vendor cannot add products
❌ Products may be hidden
👉 Important for enforcing payments
7️⃣ Restrict Vendor Without Subscription (Critical)

Enable:
✔ “Force subscription before product upload”
This ensures:
👉 Vendor must buy plan before selling
🚨 Without this, vendors can bypass subscription.
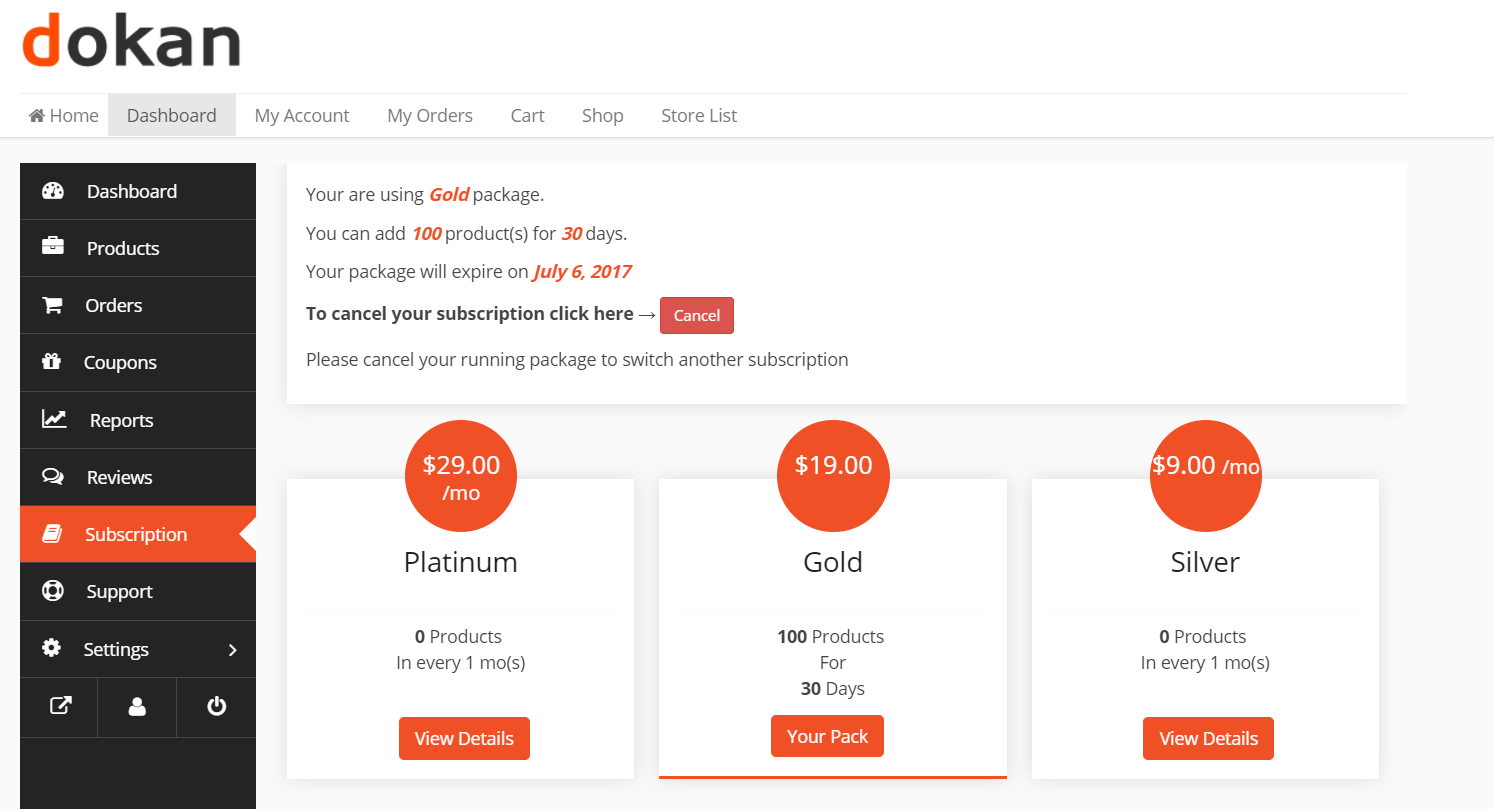
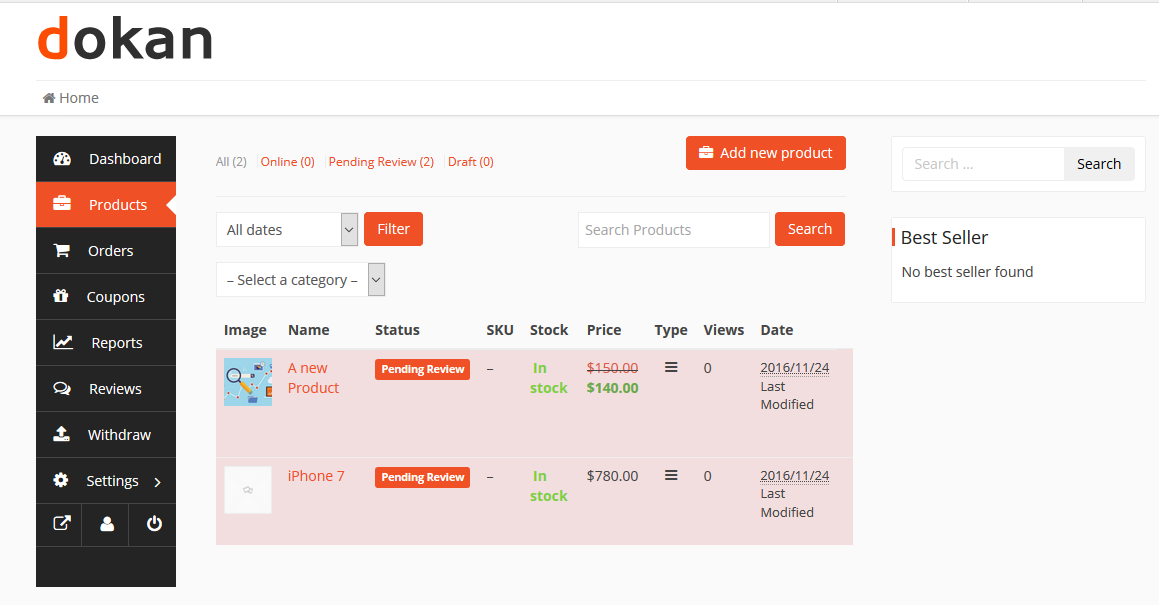
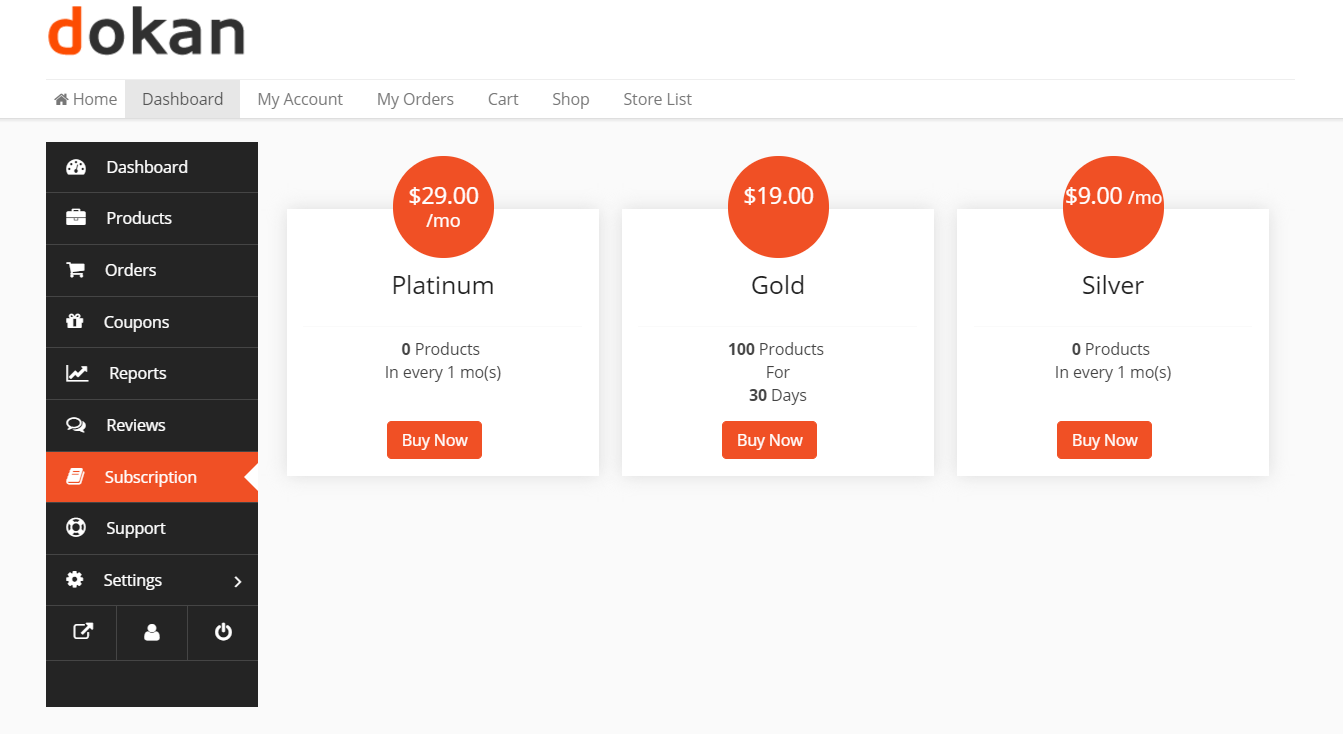
8️⃣ Display Subscription Plans on Frontend
Create a Pricing Page:
✔ List all subscription plans
✔ Highlight benefits
✔ Add CTA buttons
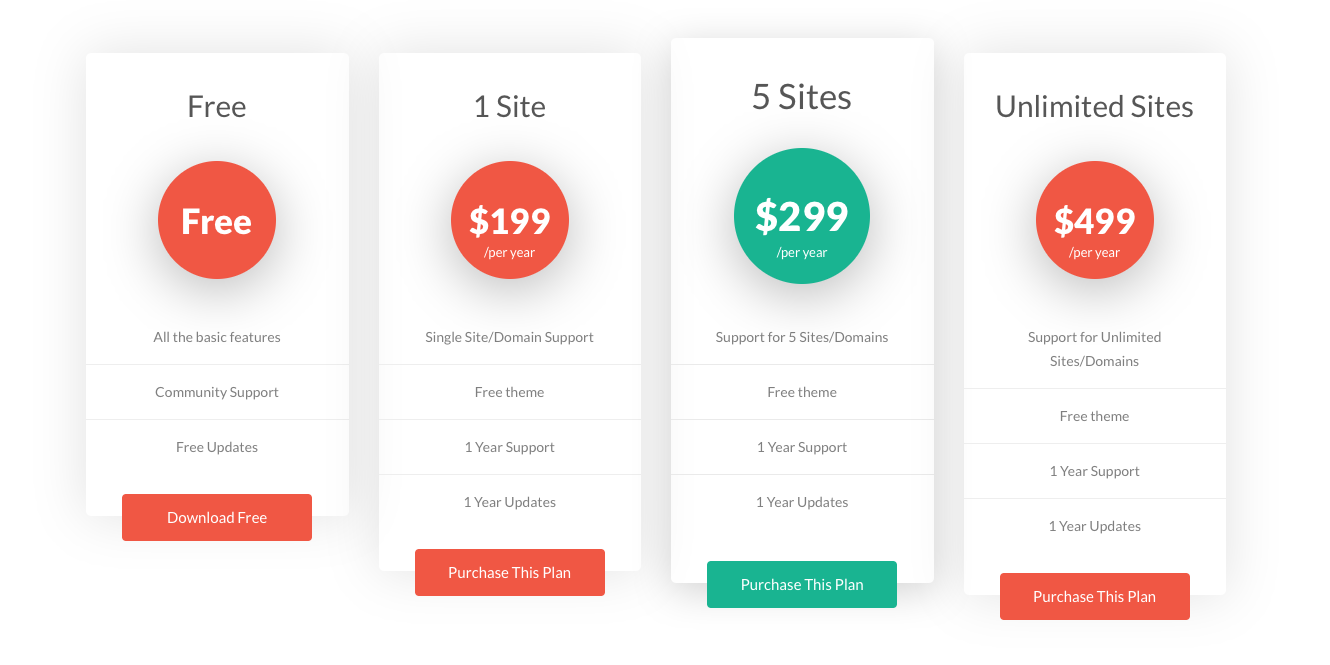
💡 Tip:
Use comparison table for better conversions.
9️⃣ Test Vendor Flow (Very Important)
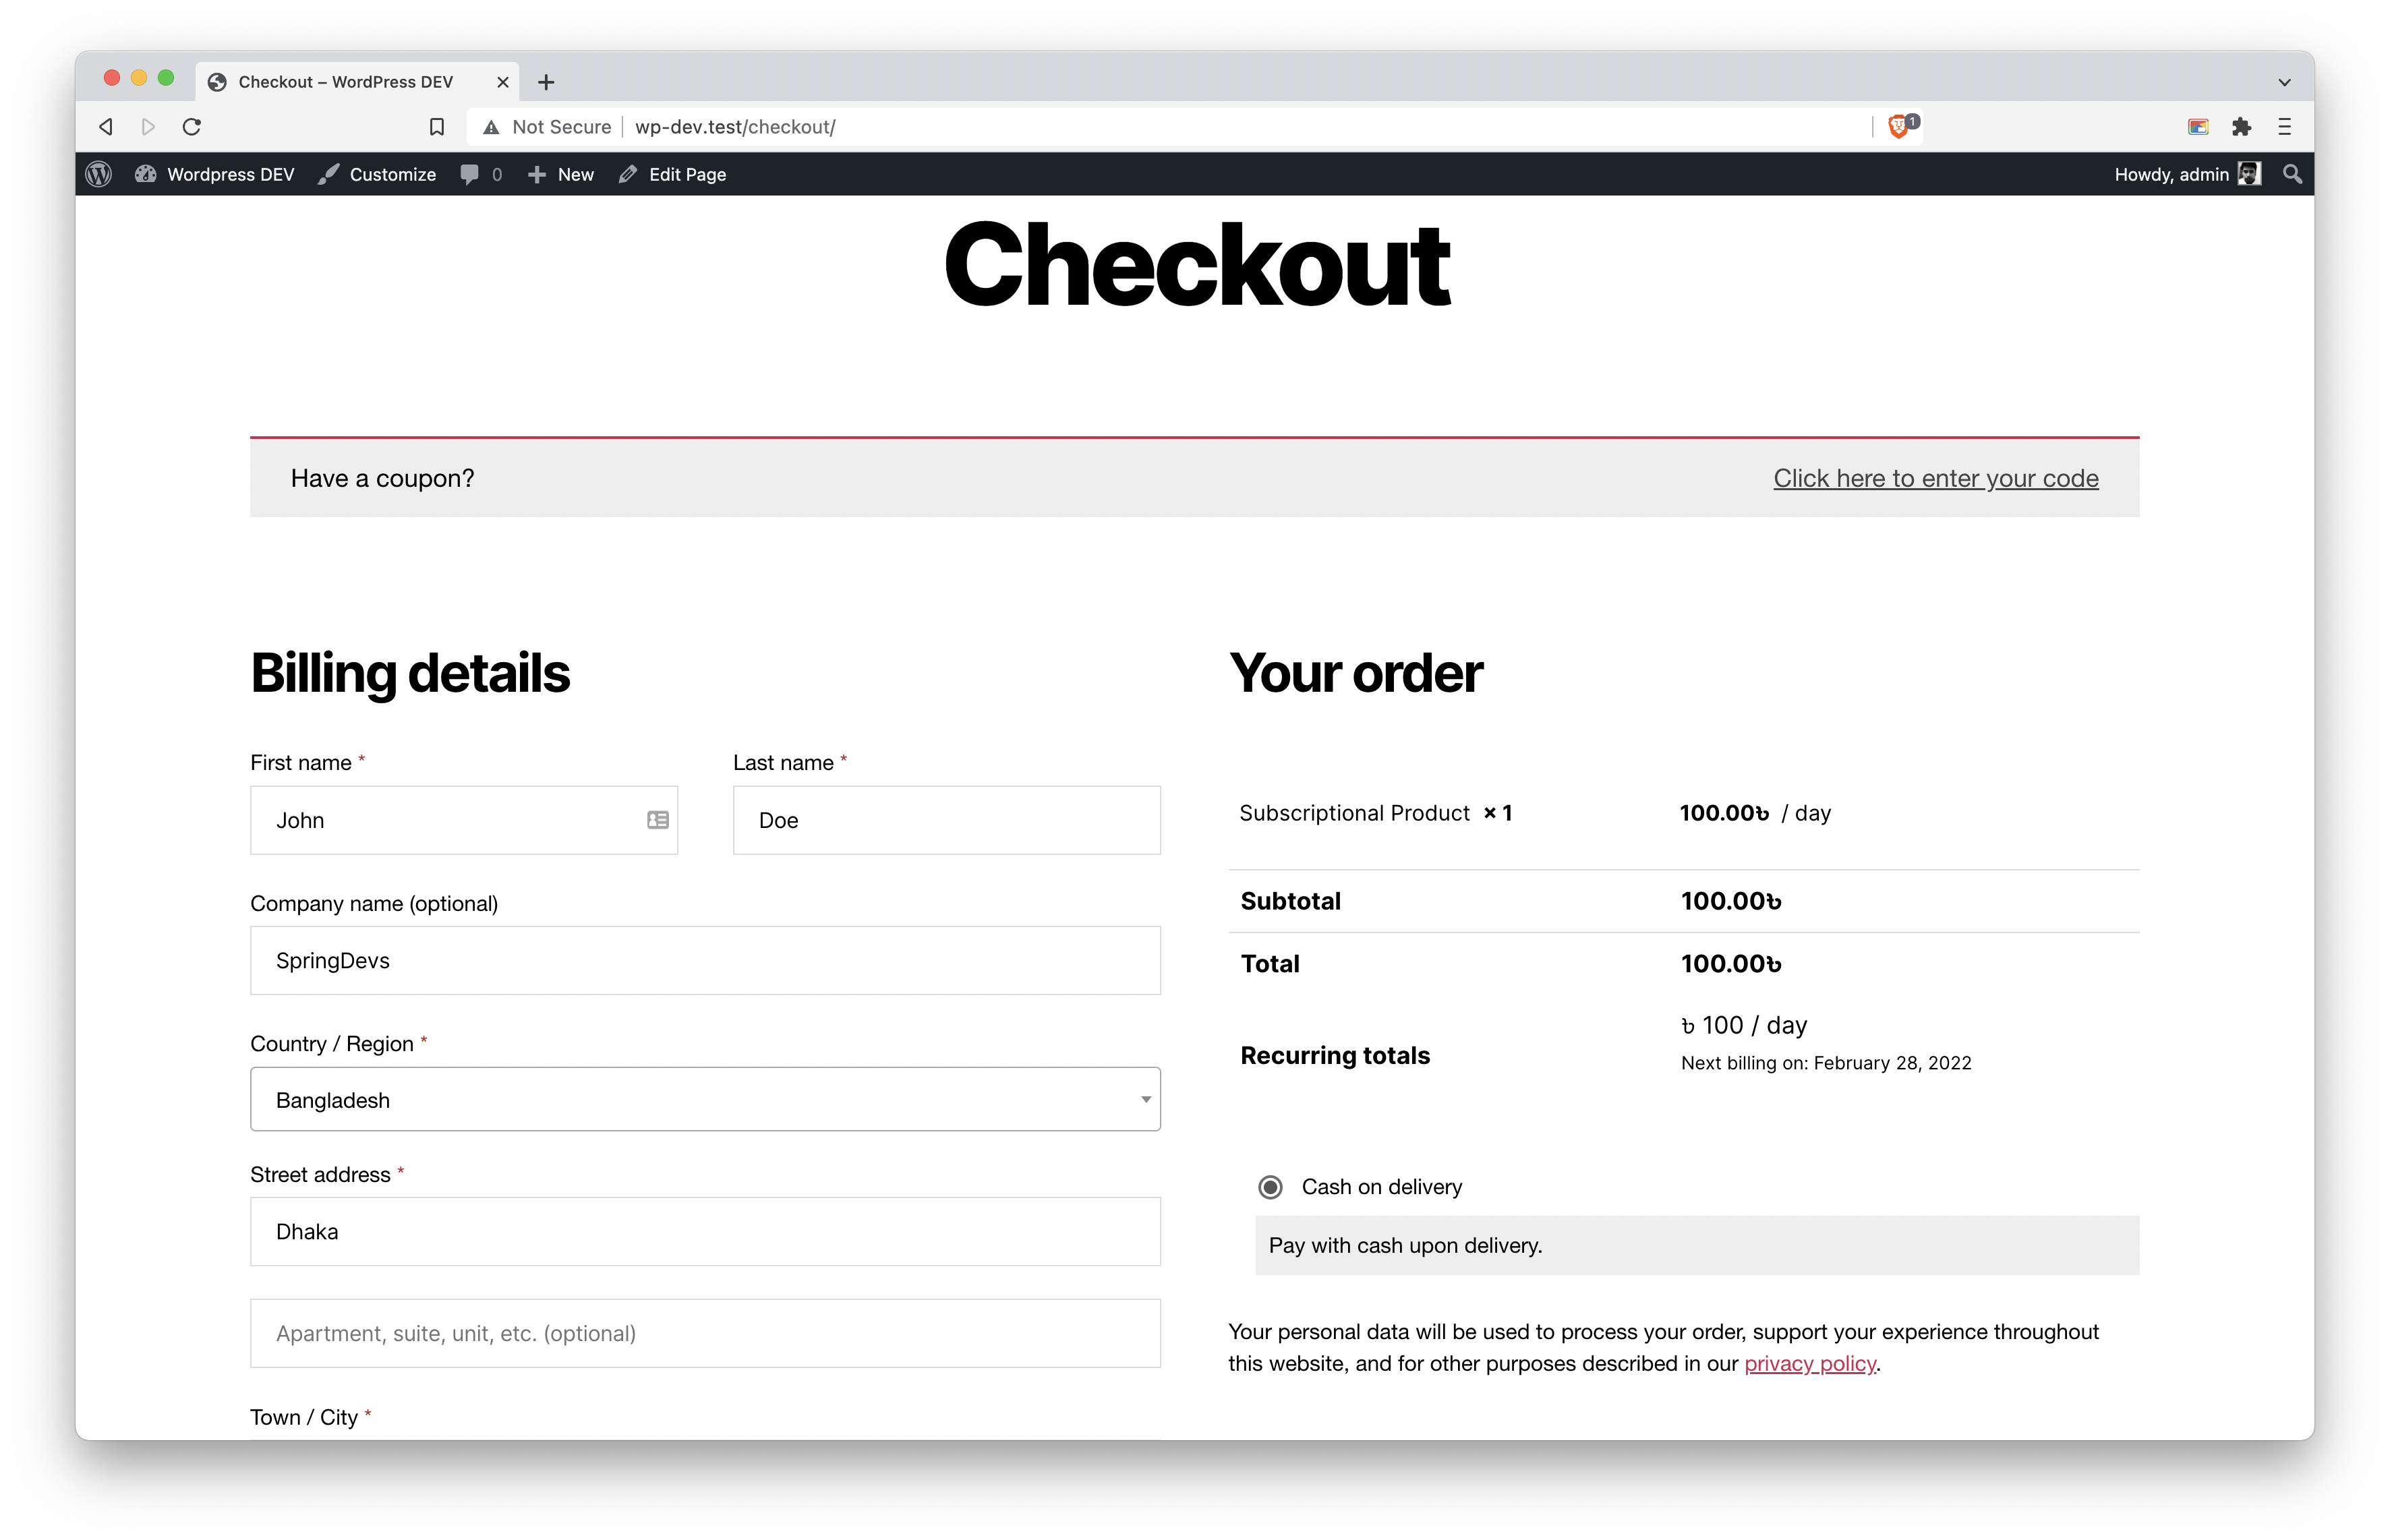
Before going live, test:
✔ Vendor registration
✔ Subscription purchase
✔ Product upload limit
✔ Plan expiry behavior
✔ Renewal flow
🧪 Testing ensures no revenue leak
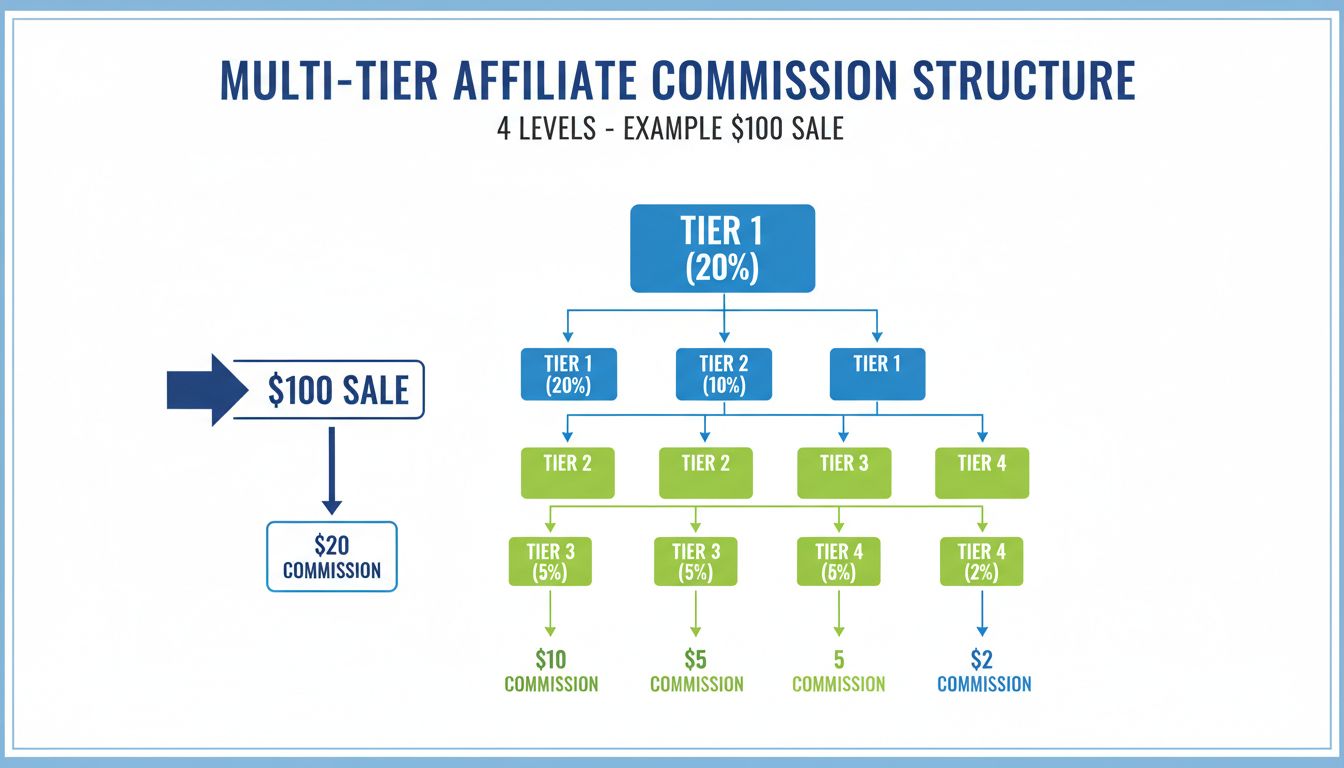
🔟 Advanced Use Cases
Dokan subscription plans can support:
✔ Multi-tier marketplace (Basic → Premium)
✔ Category-based selling permissions
✔ Featured listing upsell
✔ Commission-based incentives
✔ Hybrid model (Subscription + Commission)
👉 Perfect for scaling marketplace business.
🚨 Common Mistakes to Avoid
❌ Not forcing subscription
❌ Wrong product type selection
❌ Ignoring renewal setup
❌ No testing before launch
❌ Confusing pricing plans
👉 Small mistake = big revenue loss
📈 How to Optimize Subscription Plans


For better conversions:
✔ Offer 3 plans (Basic, Standard, Premium)
✔ Highlight “Most Popular” plan
✔ Provide clear benefits
✔ Add urgency (limited offer)
📊 Good pricing strategy = more upgrades
📚 Also Read (Internal Links)

Hire Me on Upwork – Dokan & WooCommerce Expert
