
Every multi-vendor marketplace is different.
Some need extra vendor details, while others require custom product information that Dokan does not provide by default.
If you’re running a marketplace using Dokan, adding custom fields to vendor forms allows you to collect the exact information your business needs.
This guide explains how to add custom fields in Dokan vendor forms, from simple use cases to advanced customization.
🔴 Why Add Custom Fields in Dokan Vendor Forms?
By default, Dokan vendor forms are basic.
Custom fields help you:
-
Collect additional vendor information
-
Add marketplace-specific product details
-
Improve data accuracy
-
Reduce manual follow-ups
-
Build niche-specific marketplaces

🧠 Where Can You Add Custom Fields in Dokan?
You can add custom fields to:
-
✅ Vendor Registration Form
-
✅ Vendor Profile / Store Settings
-
✅ Add New Product Form
-
✅ Edit Product Form
Each serves a different business purpose.
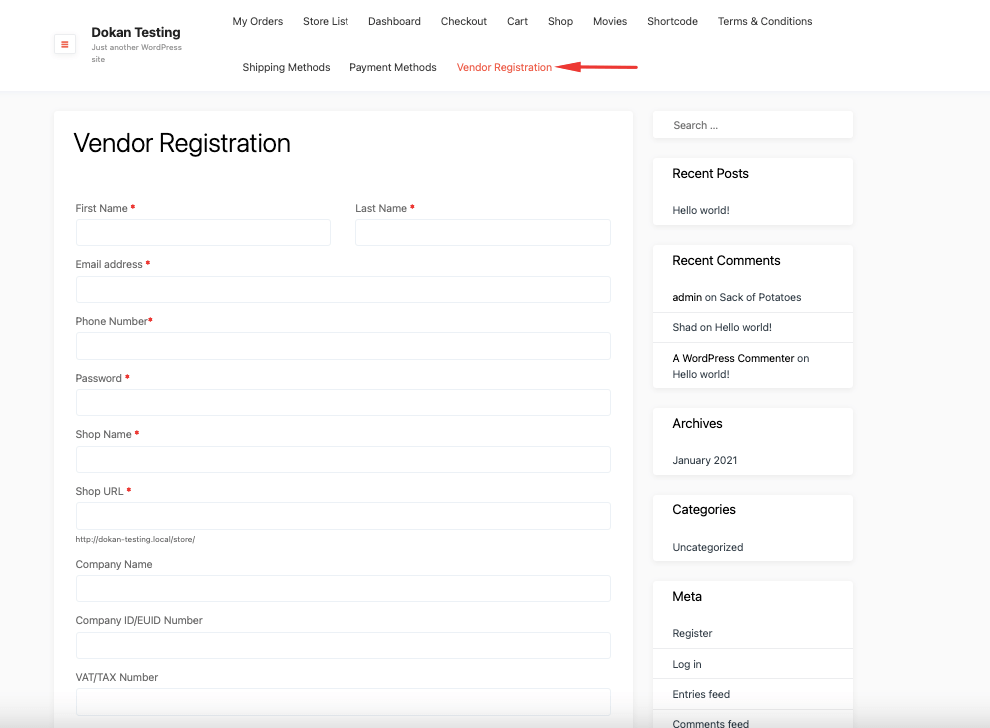
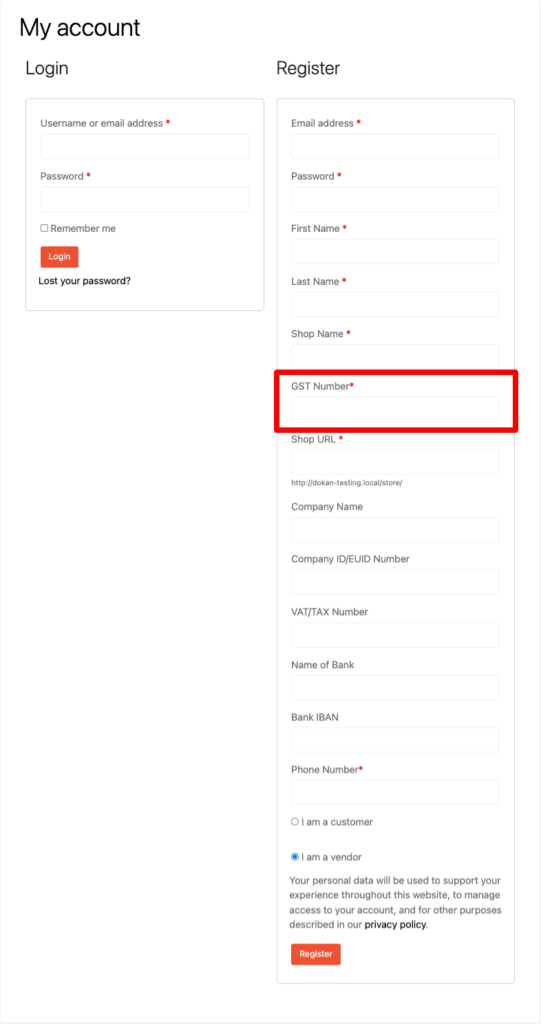
1️⃣ Adding Custom Fields to Vendor Registration Form
✅ Use Case Examples
-
Business registration number
-
Store category
-
Delivery availability
-
Service type
How It Works (Concept)
-
Add a custom input field
-
Save data as user meta
-
Display or use it later in admin/vendor dashboard
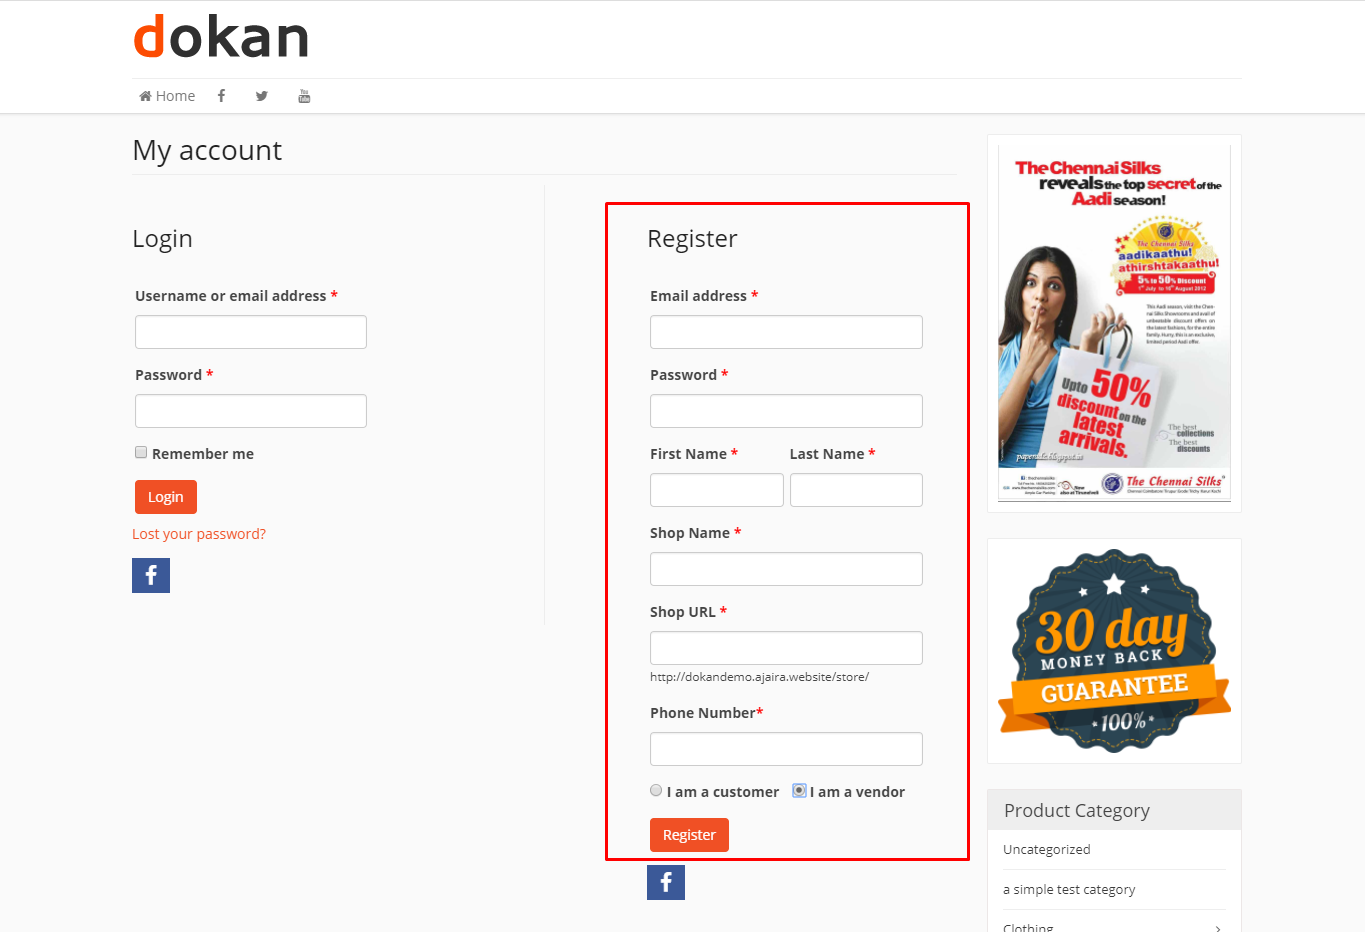
👉 Best for onboarding & vendor verification
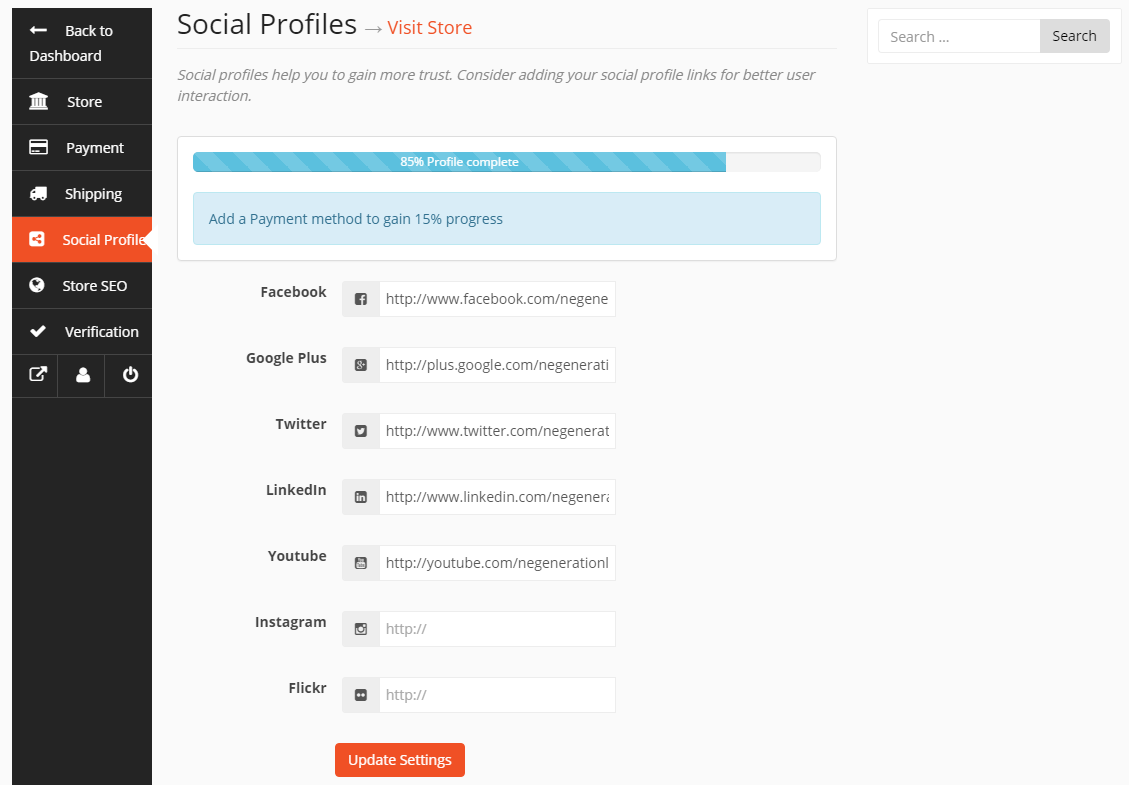
2️⃣ Adding Custom Fields to Vendor Store Settings
Vendor store settings are ideal for profile-level information.
Common Custom Fields
-
Store tagline
-
Support phone number
-
Working hours
-
Store policies
These fields appear inside the vendor dashboard, not WordPress admin.
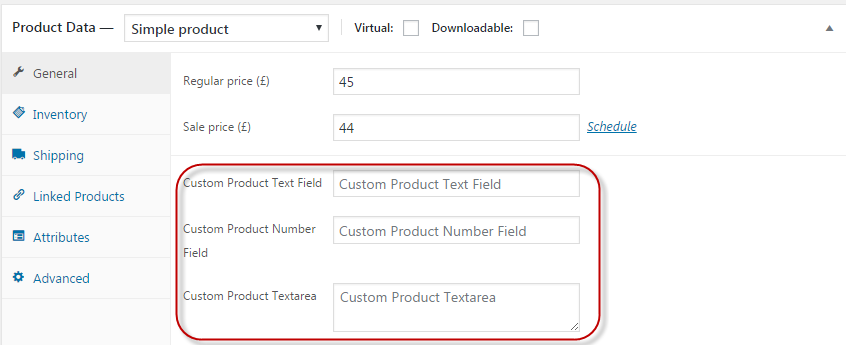
3️⃣ Adding Custom Fields to Dokan Product Forms (Most Popular)
Most marketplaces need extra product information.
Example Custom Product Fields
-
Delivery time
-
Warranty details
-
Service duration
-
Custom pricing options
-
License type
These fields appear on:
-
Add Product page
-
Edit Product page
-
Product frontend (optional)

4️⃣ Required vs Optional Custom Fields
You can control whether a field is:
-
Required (must be filled)
-
Optional (vendor choice)
Example
✔ Make “Delivery Time” required
✔ Make “Additional Notes” optional
This helps maintain data consistency across vendors.
5️⃣ Displaying Custom Fields on Product Pages
Custom fields don’t help unless customers can see them.
You can display fields:
-
Below product description
-
In a custom product tab
-
Near price or add-to-cart section
6️⃣ Saving & Managing Custom Field Data
Custom field data is stored as:
-
User meta (vendor fields)
-
Post meta (product fields)
Admins can:
-
View data from WordPress admin
-
Use data for approvals
-
Filter vendors or products
⚠️ Limitations of Default Dokan Custom Fields
Out-of-the-box Dokan:
-
Does NOT support advanced conditional logic
-
Cannot validate complex data
-
Has limited UI control
For advanced use cases, custom development is required.
🛠️ When You Need Custom Dokan Development
You should consider custom development if you need:
-
Conditional fields (show/hide based on selection)
-
Role-based fields
-
Validation rules
-
API-based integrations
-
Performance-optimized forms
Custom development ensures:
✔ Clean code
✔ Update-safe implementation
✔ Scalable solution
📚 Also Read

Hire Me on Upwork – Dokan & WooCommerce Expert

One Response